Create RFQ, Confirm PO & Create Vendor Bill (Purchase Flow)
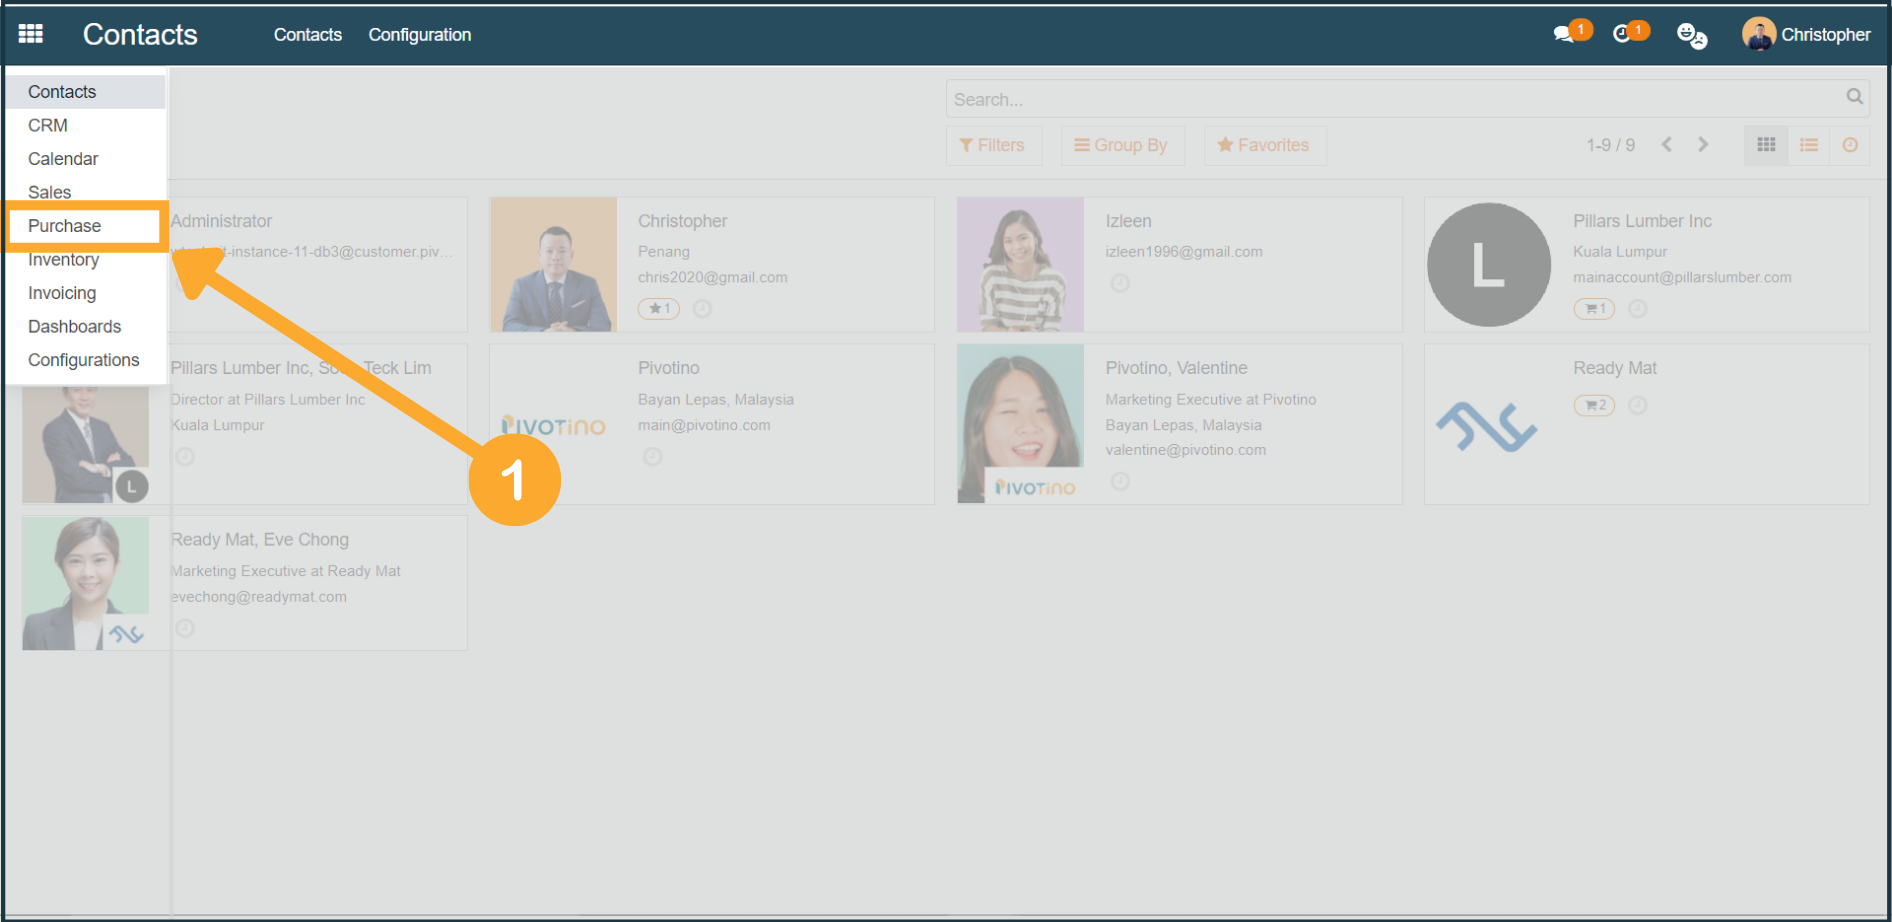
1. To create a new RFQ, click on the top left icon, then select "Purchase" on the drop-down menu.
![](/web/image/2883-9d5eba31/RFQ%20%281%29.png?access_token=ba08d34c-666a-46e0-a210-36b351ad0a9b)
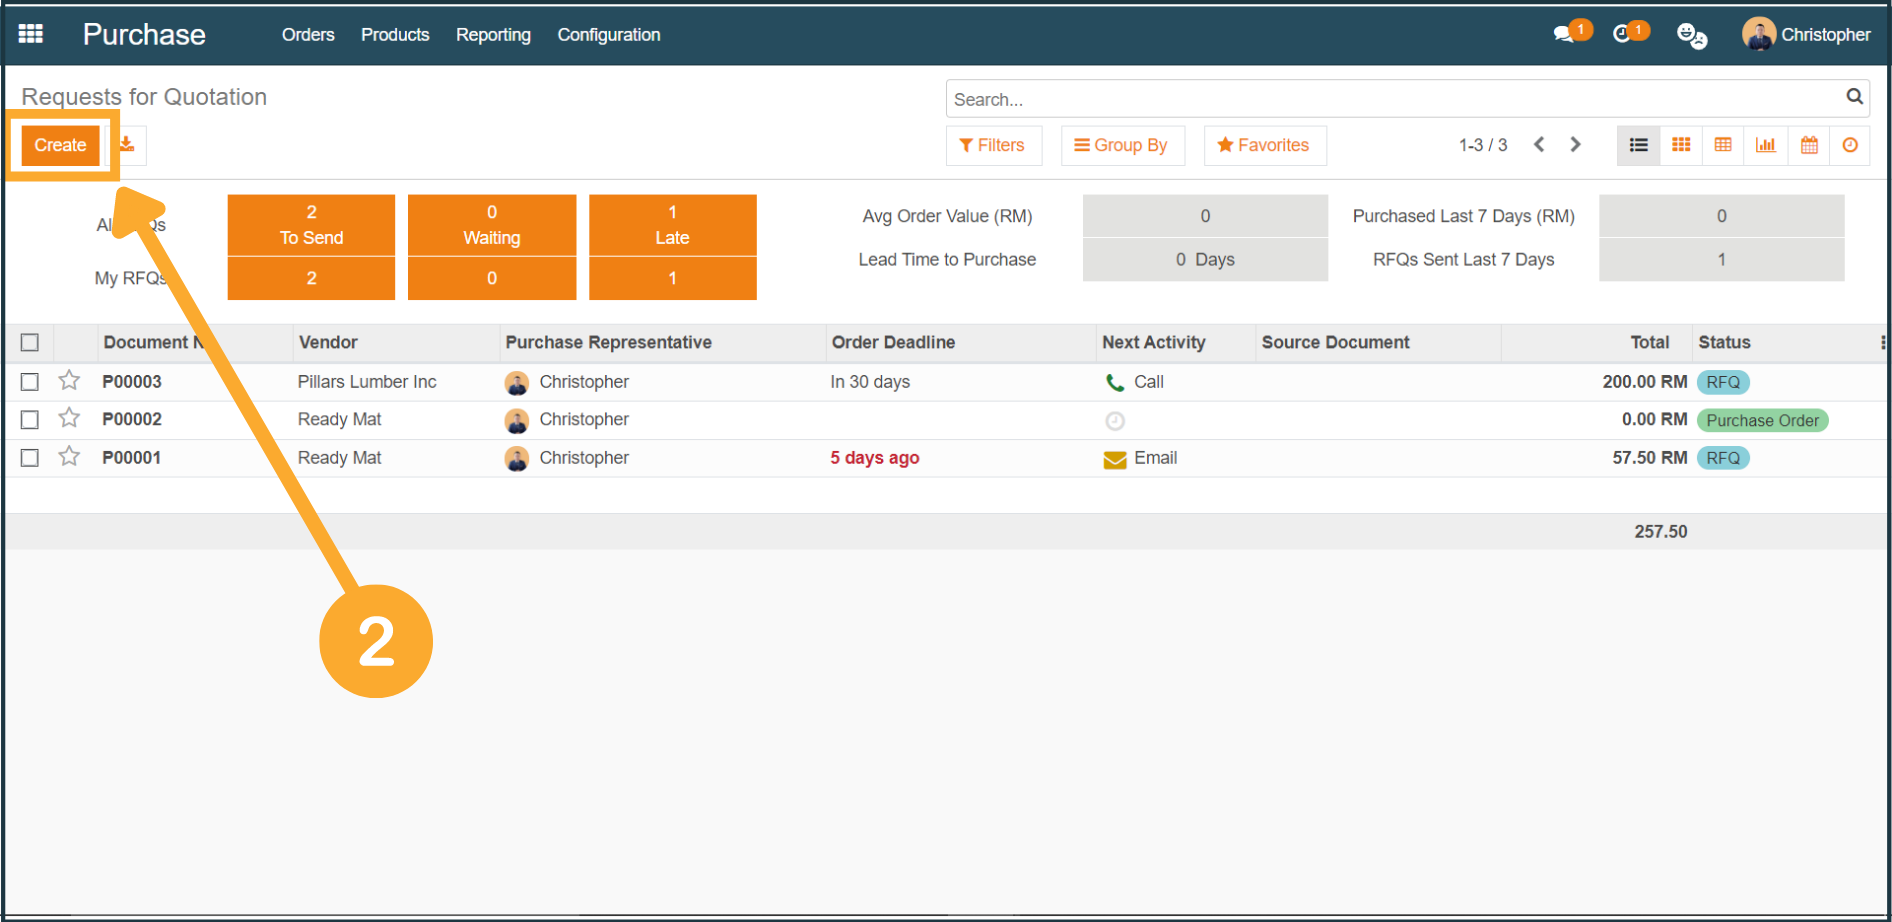
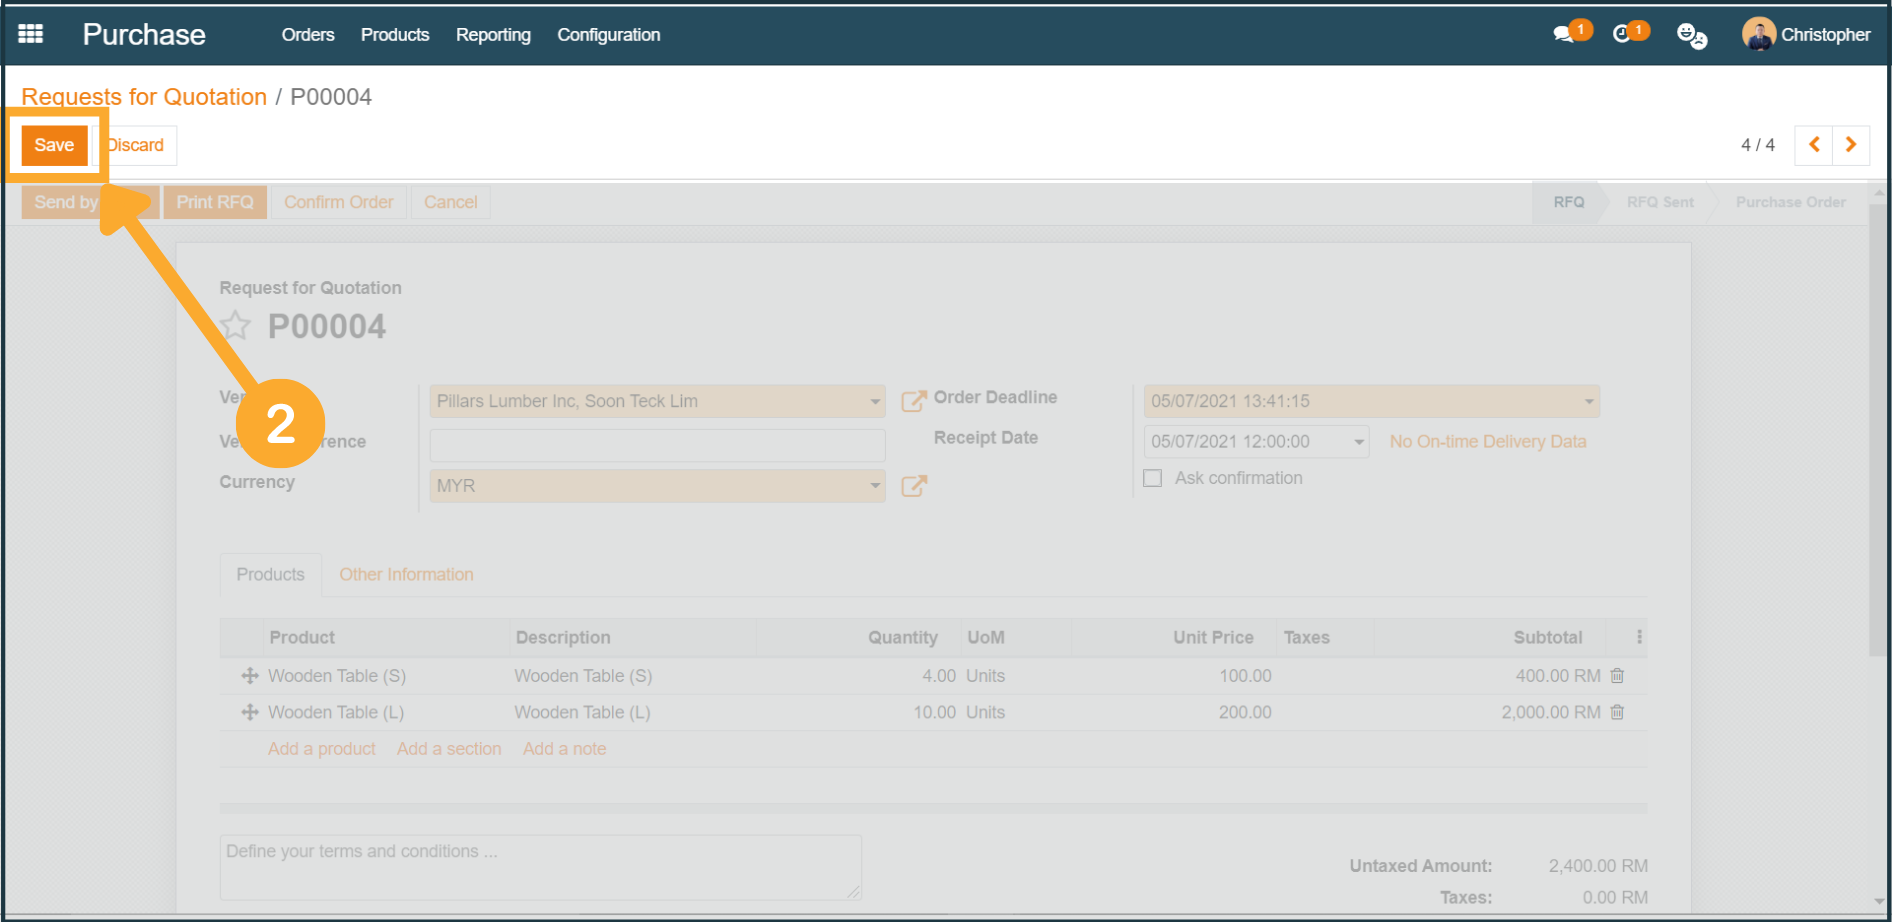
2. At the Requests for Quotation page of Purchase, click "Create".
![](/web/image/2884-a22eca8b/RFQ%20%282%29.png?access_token=0620772f-94c4-40d9-9d7a-6826a6f7f147)
2a. Fill in the necessary information (vendors, order deadline, currency, products) in the new RFQ form.
![](/web/image/2885-8620ba4b/RFQ%20%282a%29.png?access_token=e27d91c6-f2a7-470c-93d2-960afc2c723c)
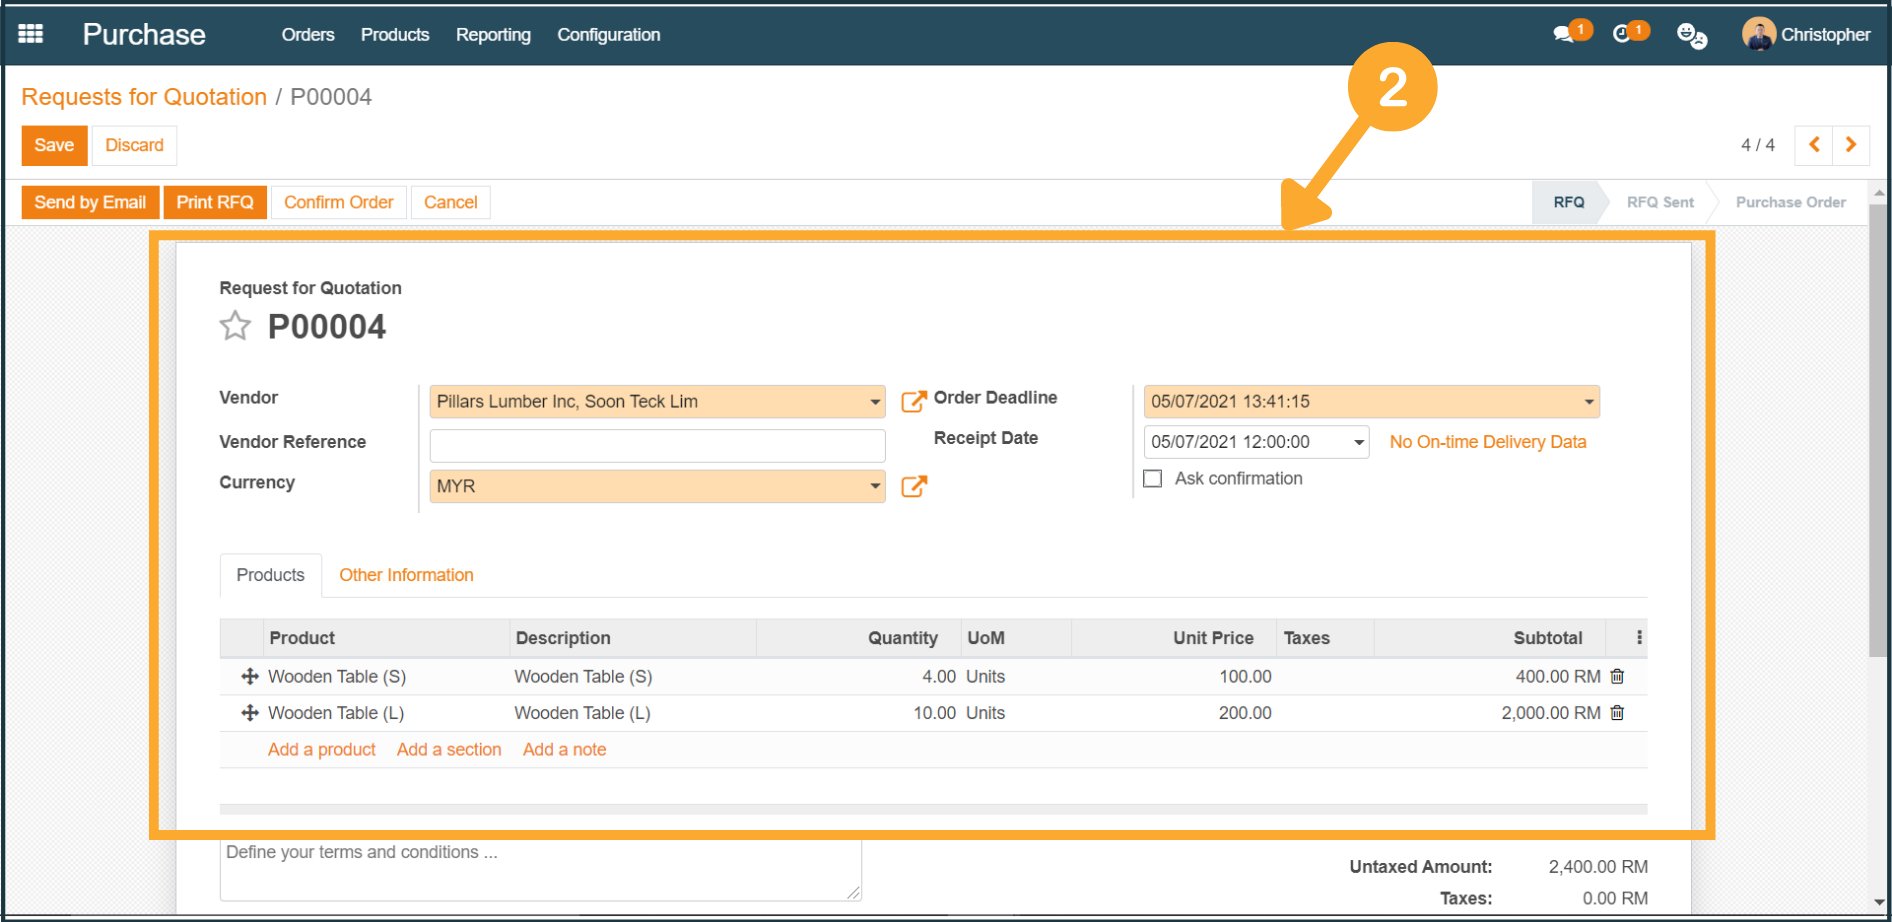
2b. Once done, click "Save" and your new RFQ will be created.
![](/web/image/2886-2270a5ad/RFQ%20%282b%29.png?access_token=c26545b7-1bb1-466b-81fc-ee7c748fcc1e)
3. After receiving the Sales Orders from your vendors, click "Confirm Order".
![](/web/image/2887-1edd4335/RFQ%20%283%29.png?access_token=90e5dcd1-9b81-4559-a610-d31fbbc8f5b8)
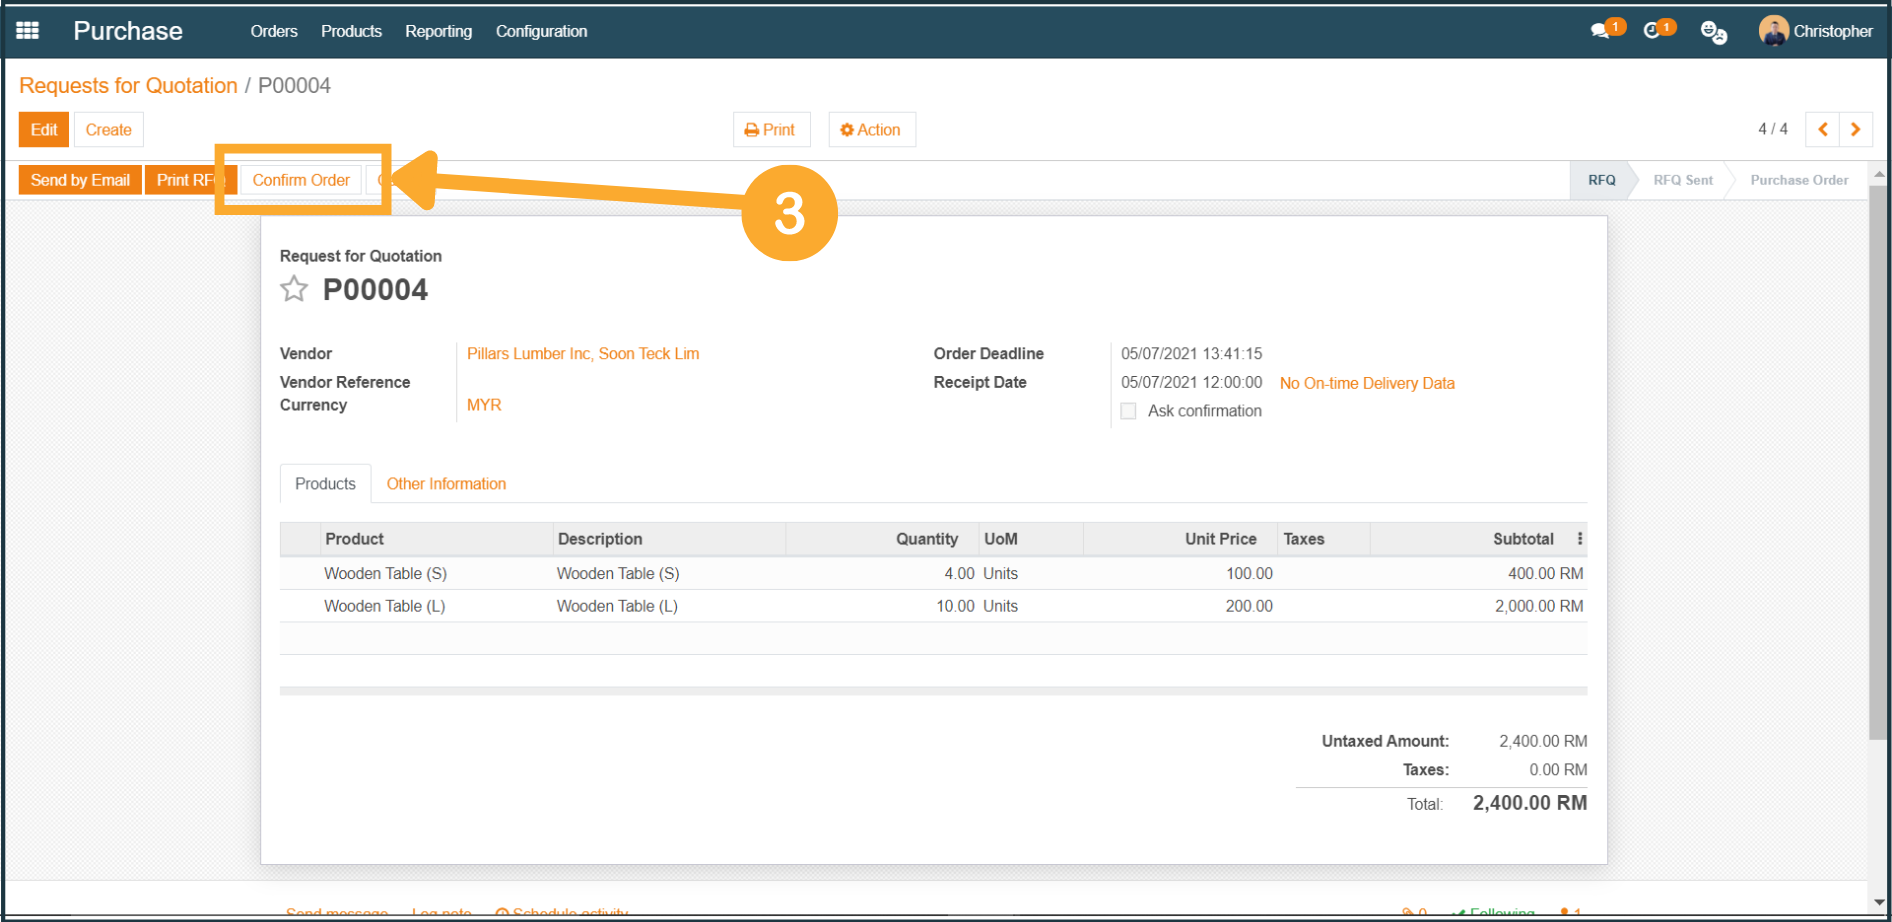
3a. Your RFQ will then be converted to a Purchase Order.
![](/web/image/2888-9d0a6863/RFQ%20%283a%29.png?access_token=e35d82bf-afdc-4e6e-b5f9-f1f6503552fa)
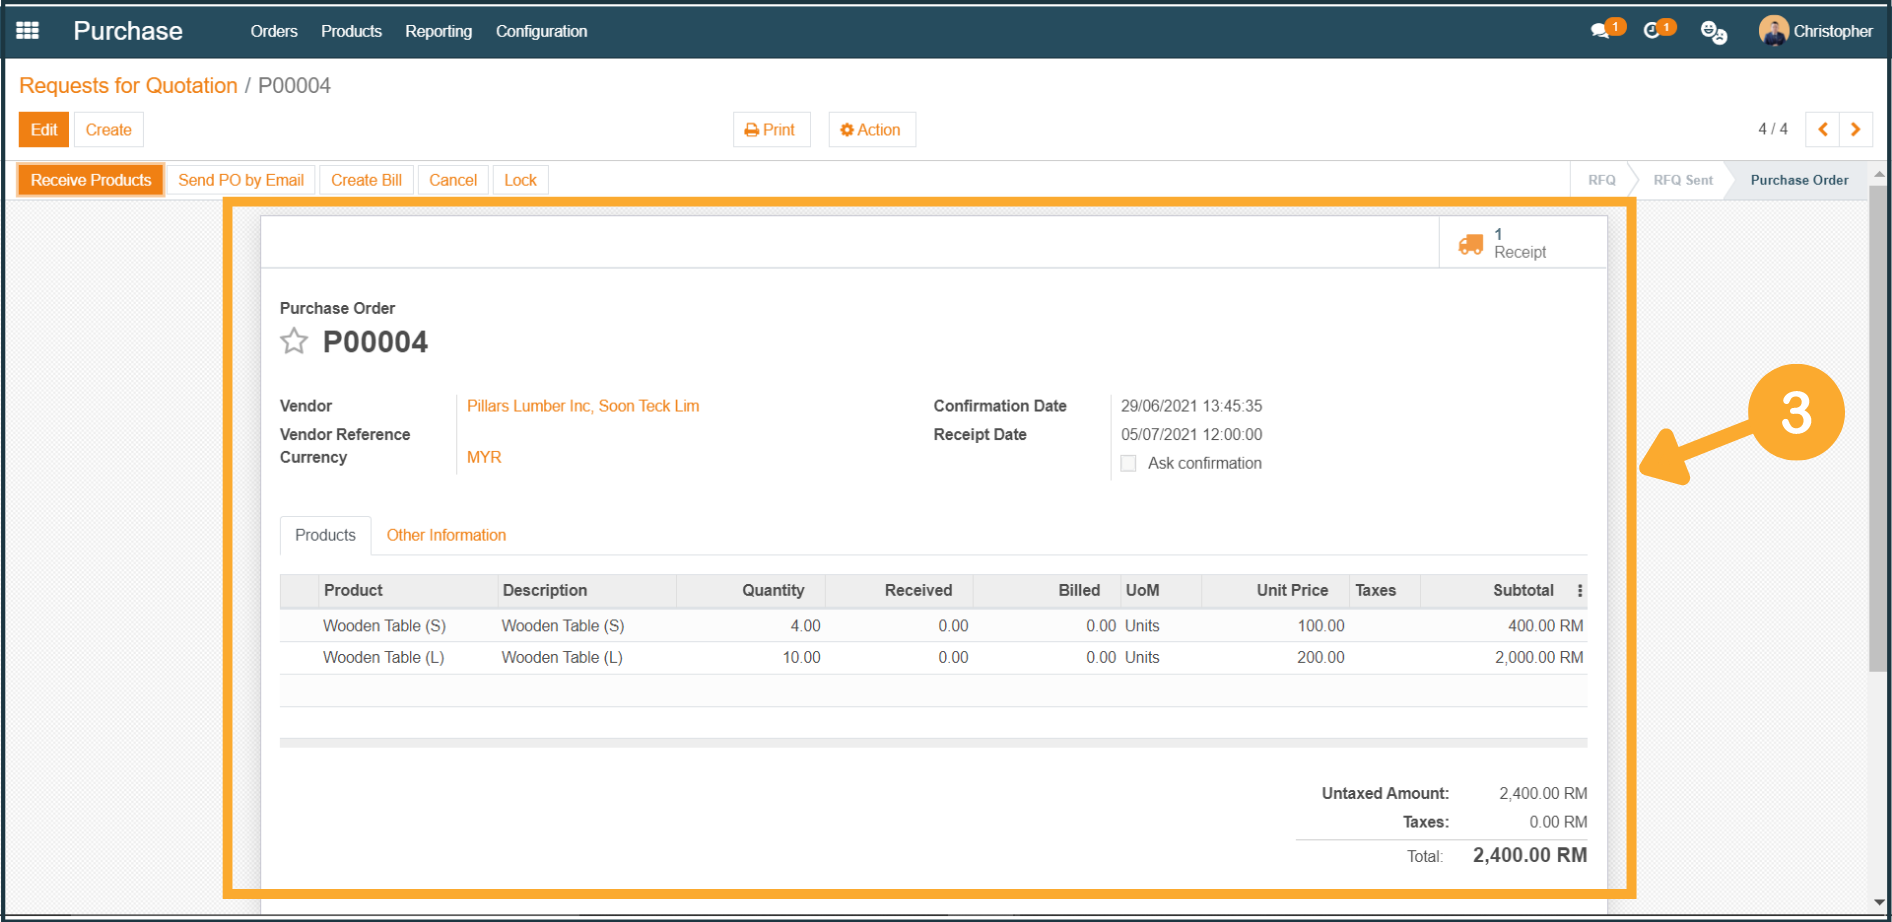
4. Once the vendors have successfully delivered the products to you, click "Received Products”.
![](/web/image/2889-2bc5d2a1/RFQ%20%284%29.png?access_token=90f9a74e-3fe8-4db1-b0e1-dc8976eac586)
4a. At the Receipt Order, click “Edit”.
![](/web/image/2890-ed629149/RFQ%20%284a%29.png?access_token=843a2162-4fa0-4b8a-abae-3b01f455a532)
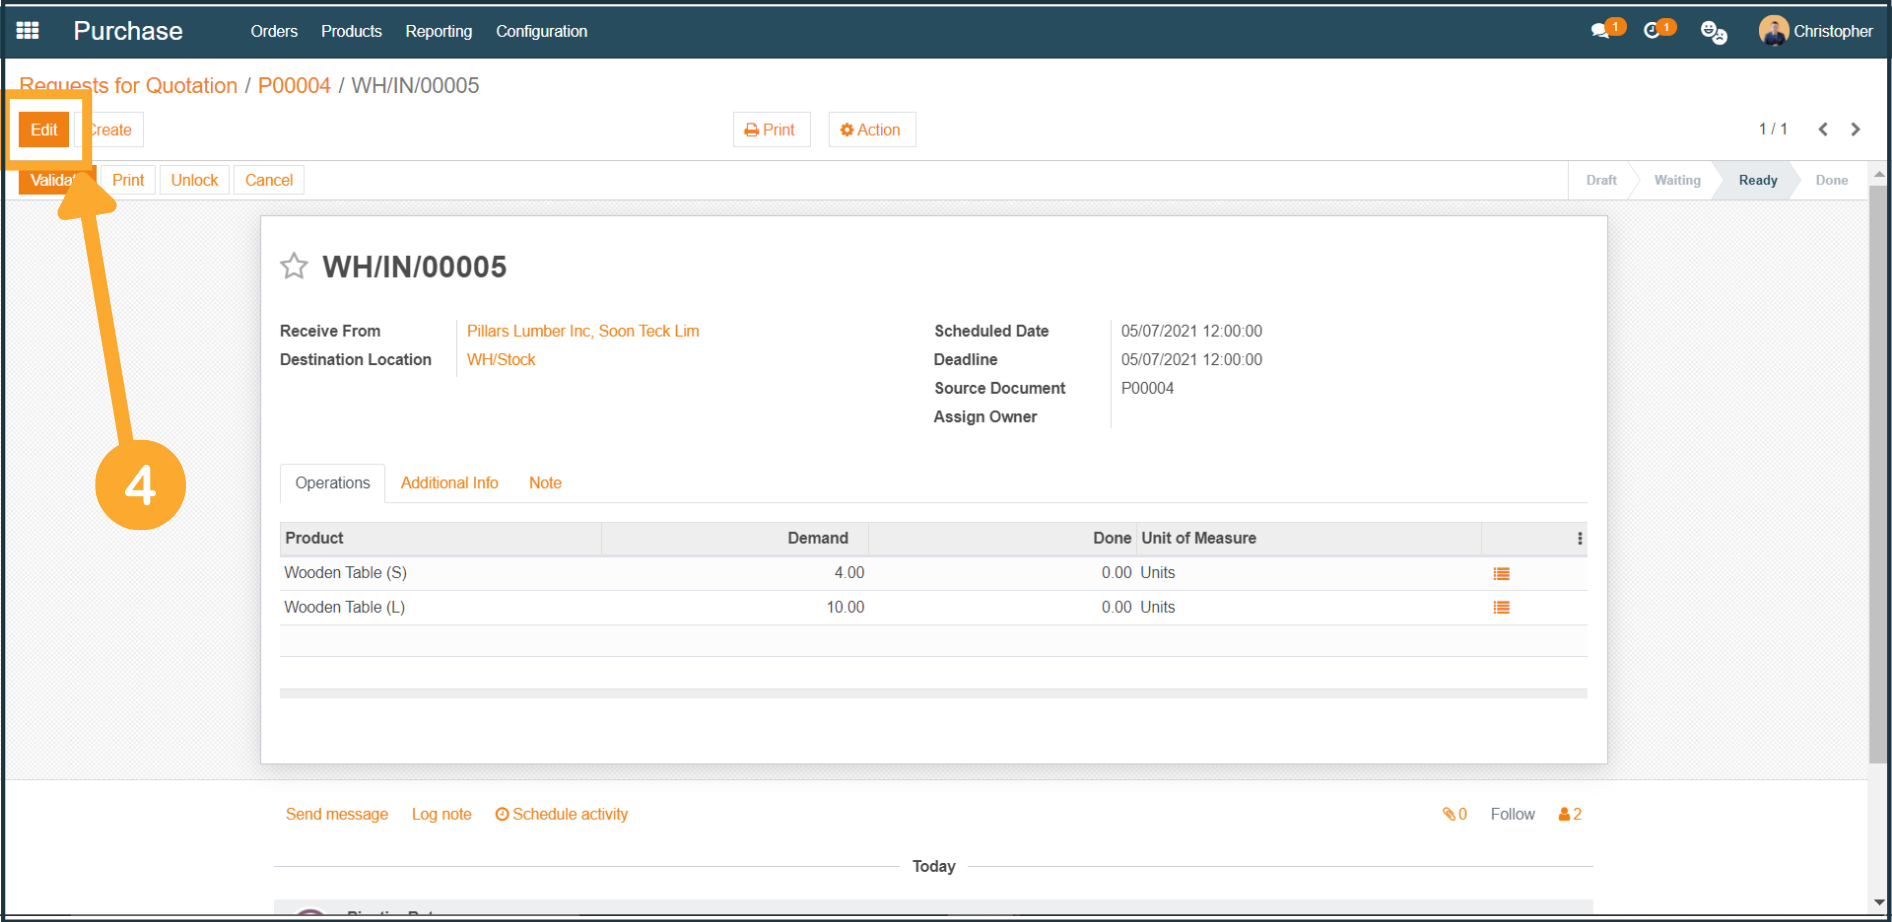
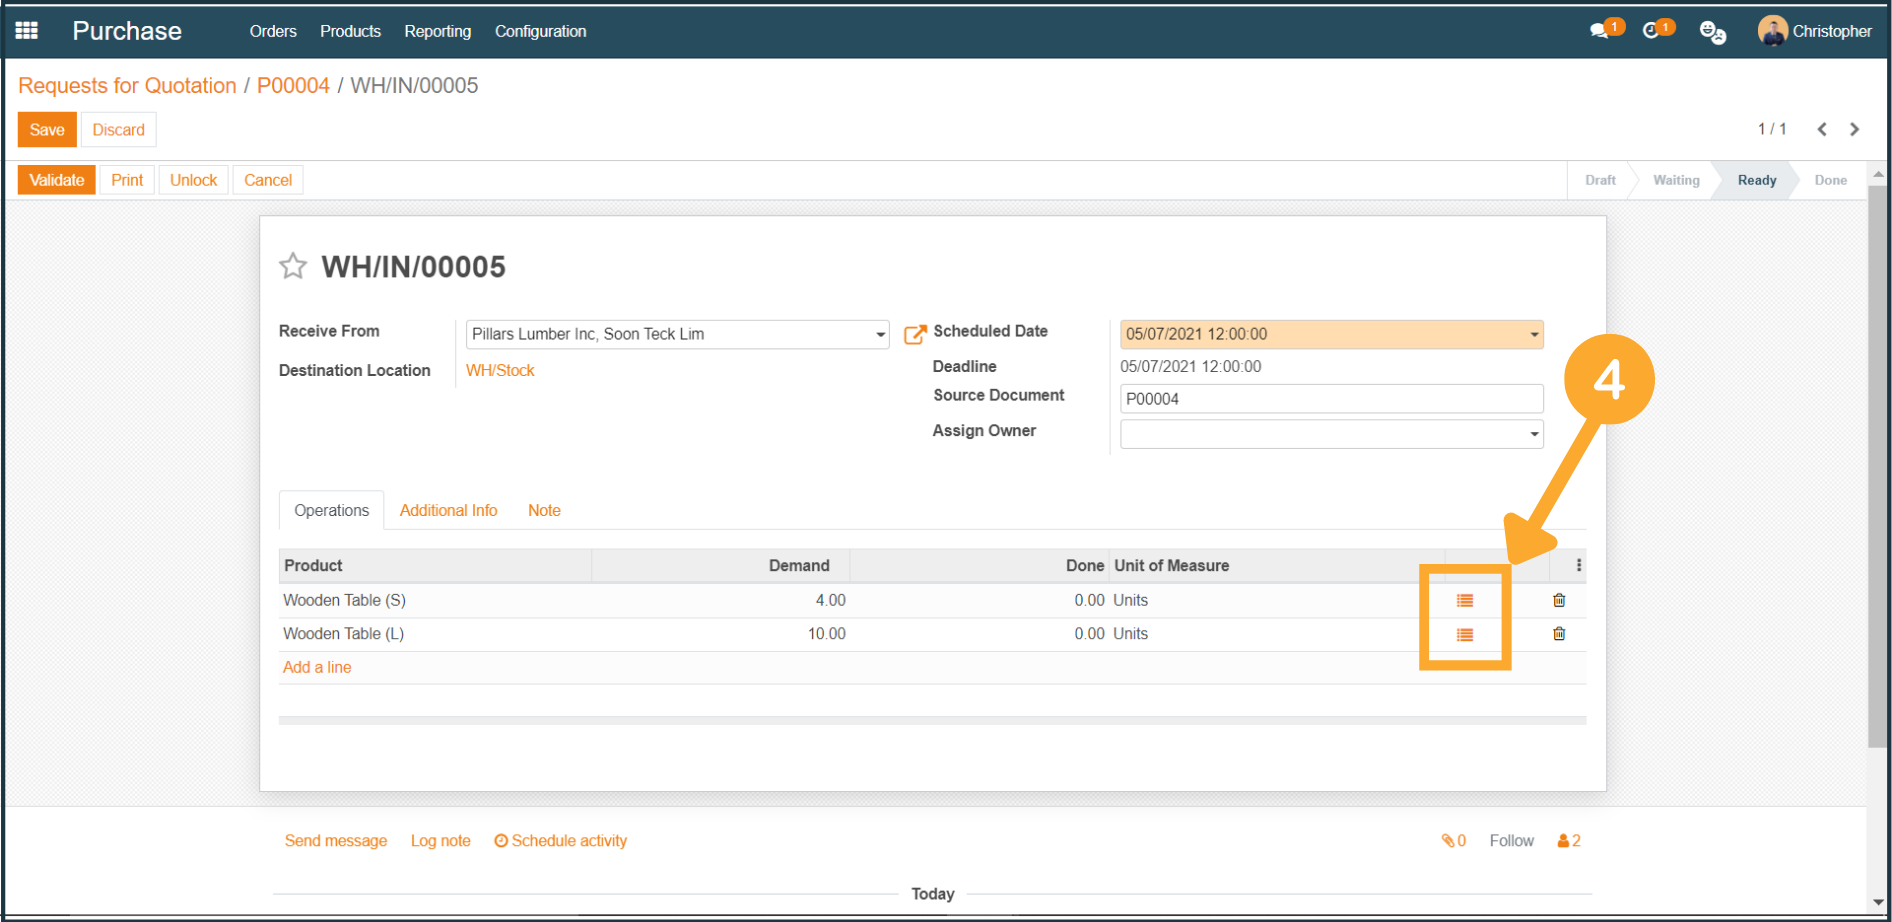
4b. At the Operations tab of the Receipt Order, click the "Listing" icon at the most right corner of each product.
![](/web/image/2891-6e647949/RFQ%20%284b%29.png?access_token=aff9e36a-c8a2-4745-96ae-40e6259b2d25)
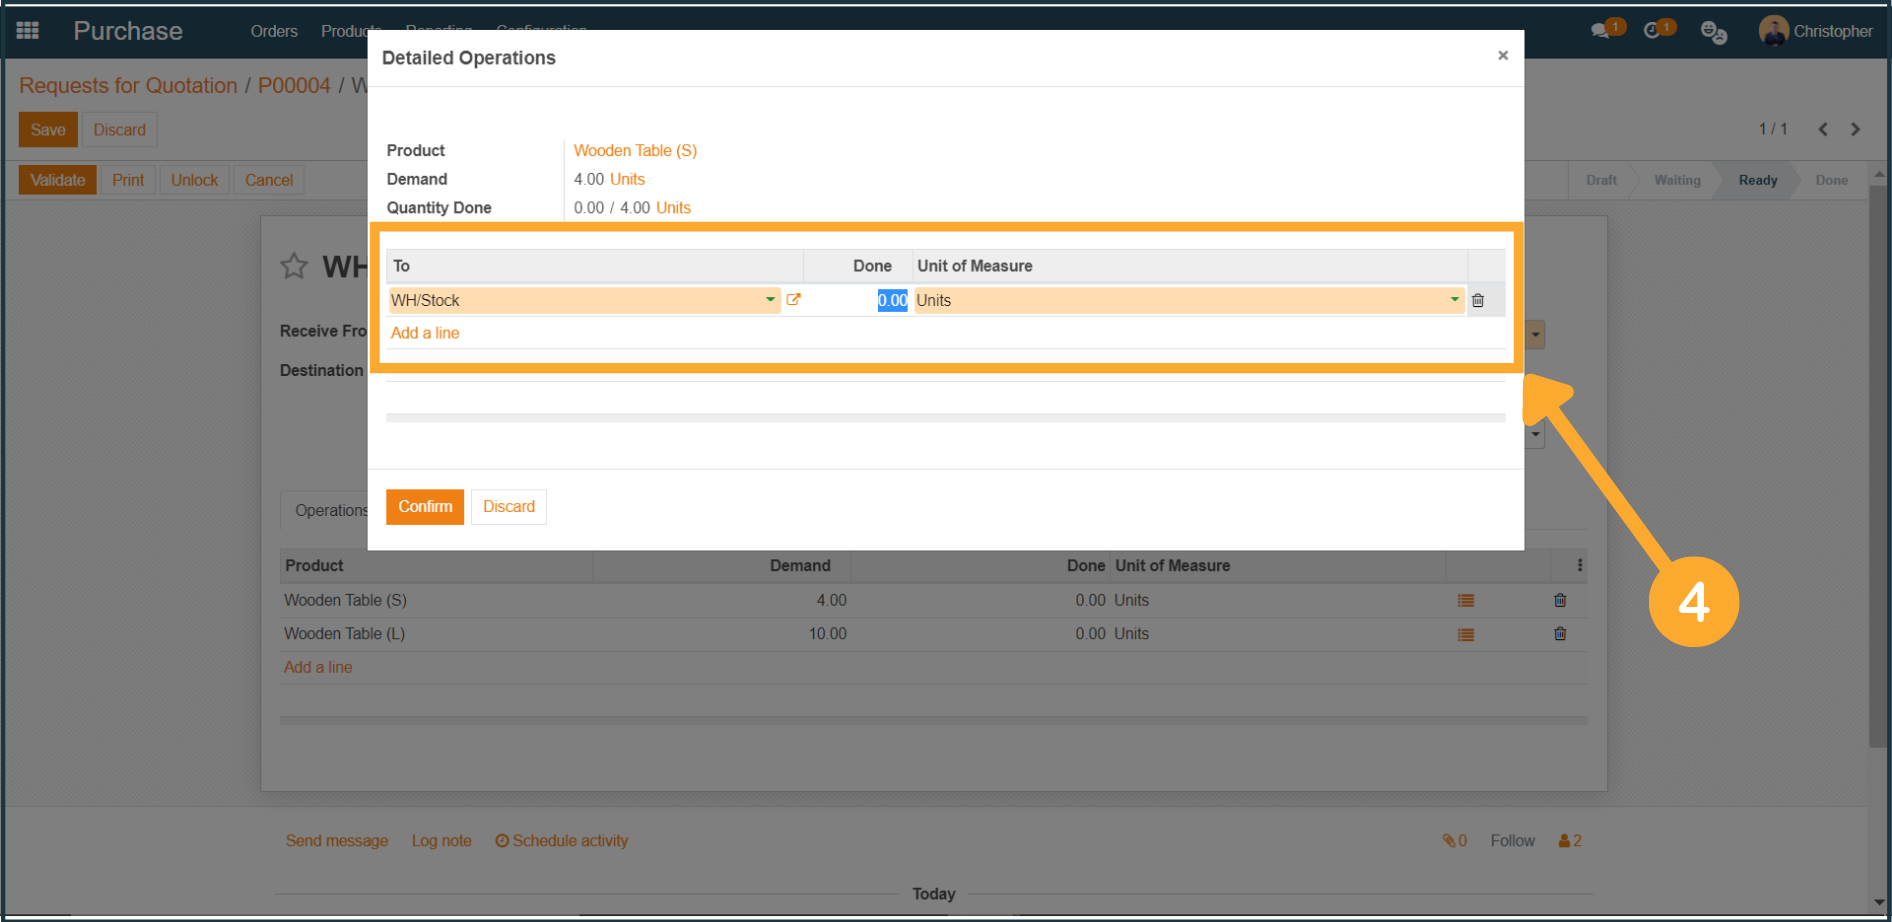
4c. At the Detailed Operations window, proceed to record down the number of products received from the vendors.
![](/web/image/2892-283f46bf/RFQ%20%284c%29.png?access_token=66b492a3-a46a-44f8-a08f-a453e4081790)
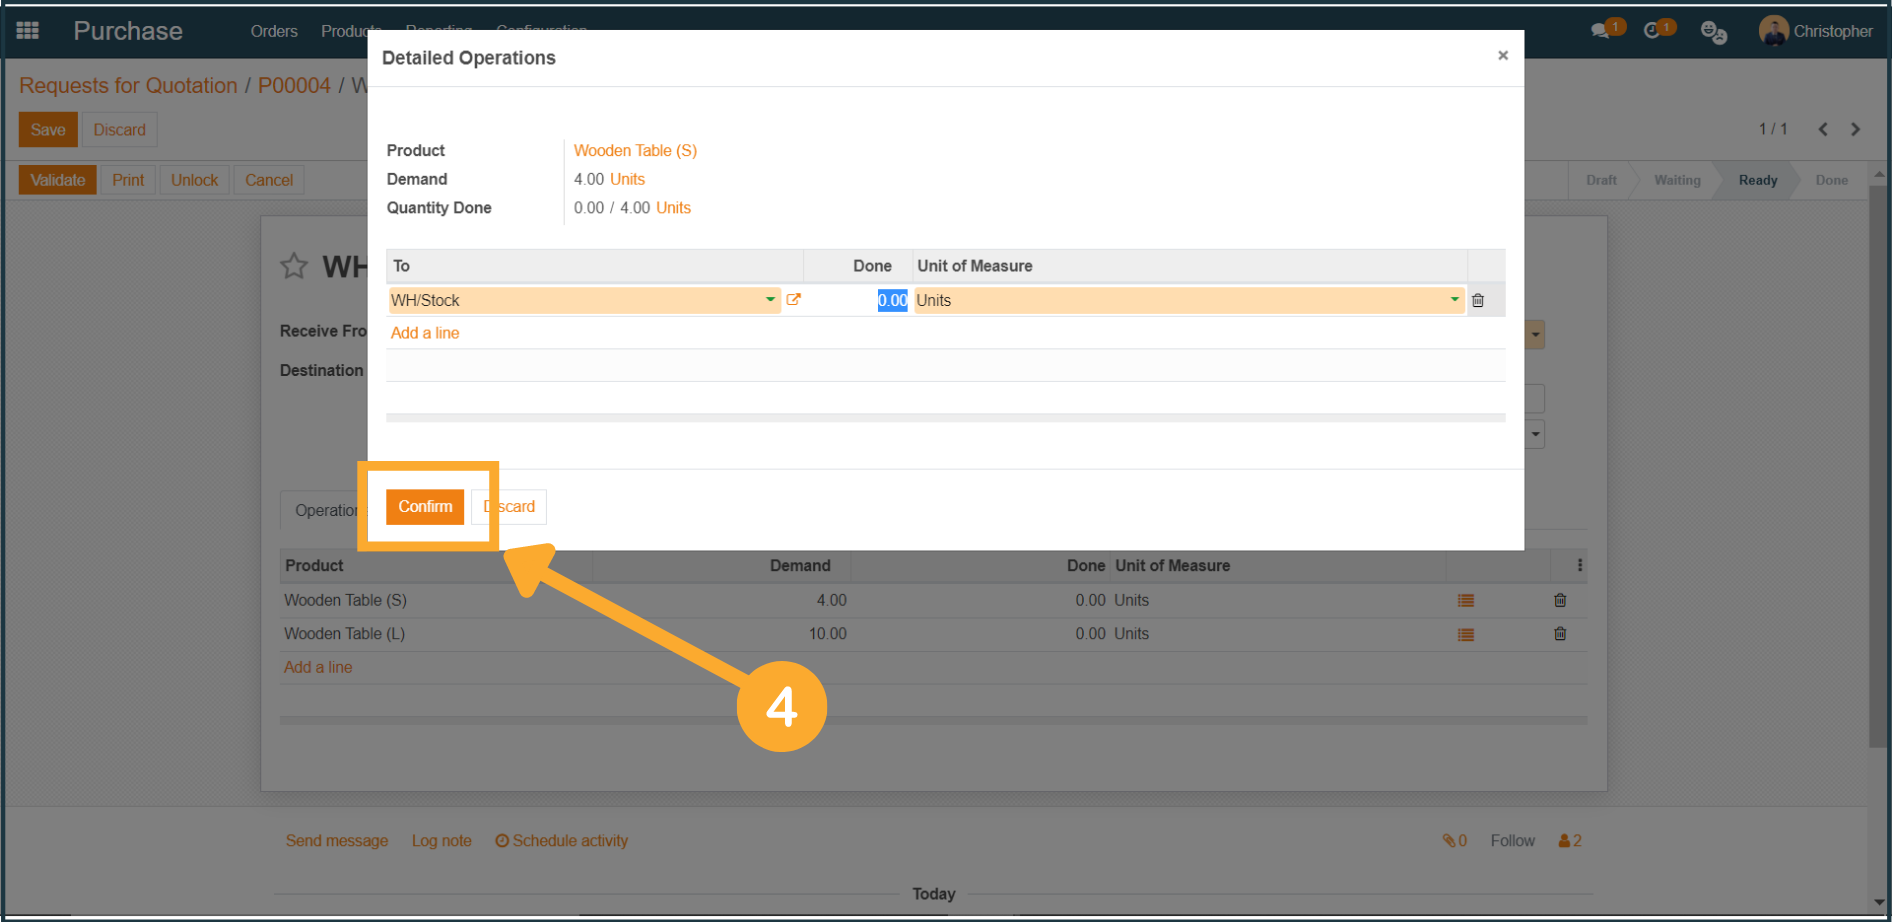
4d. When done, click "Confirm".
![](/web/image/2893-7b84a578/RFQ%20%284d%29.png?access_token=f6e79e56-e022-4b65-97f2-1fdfe371e7b9)
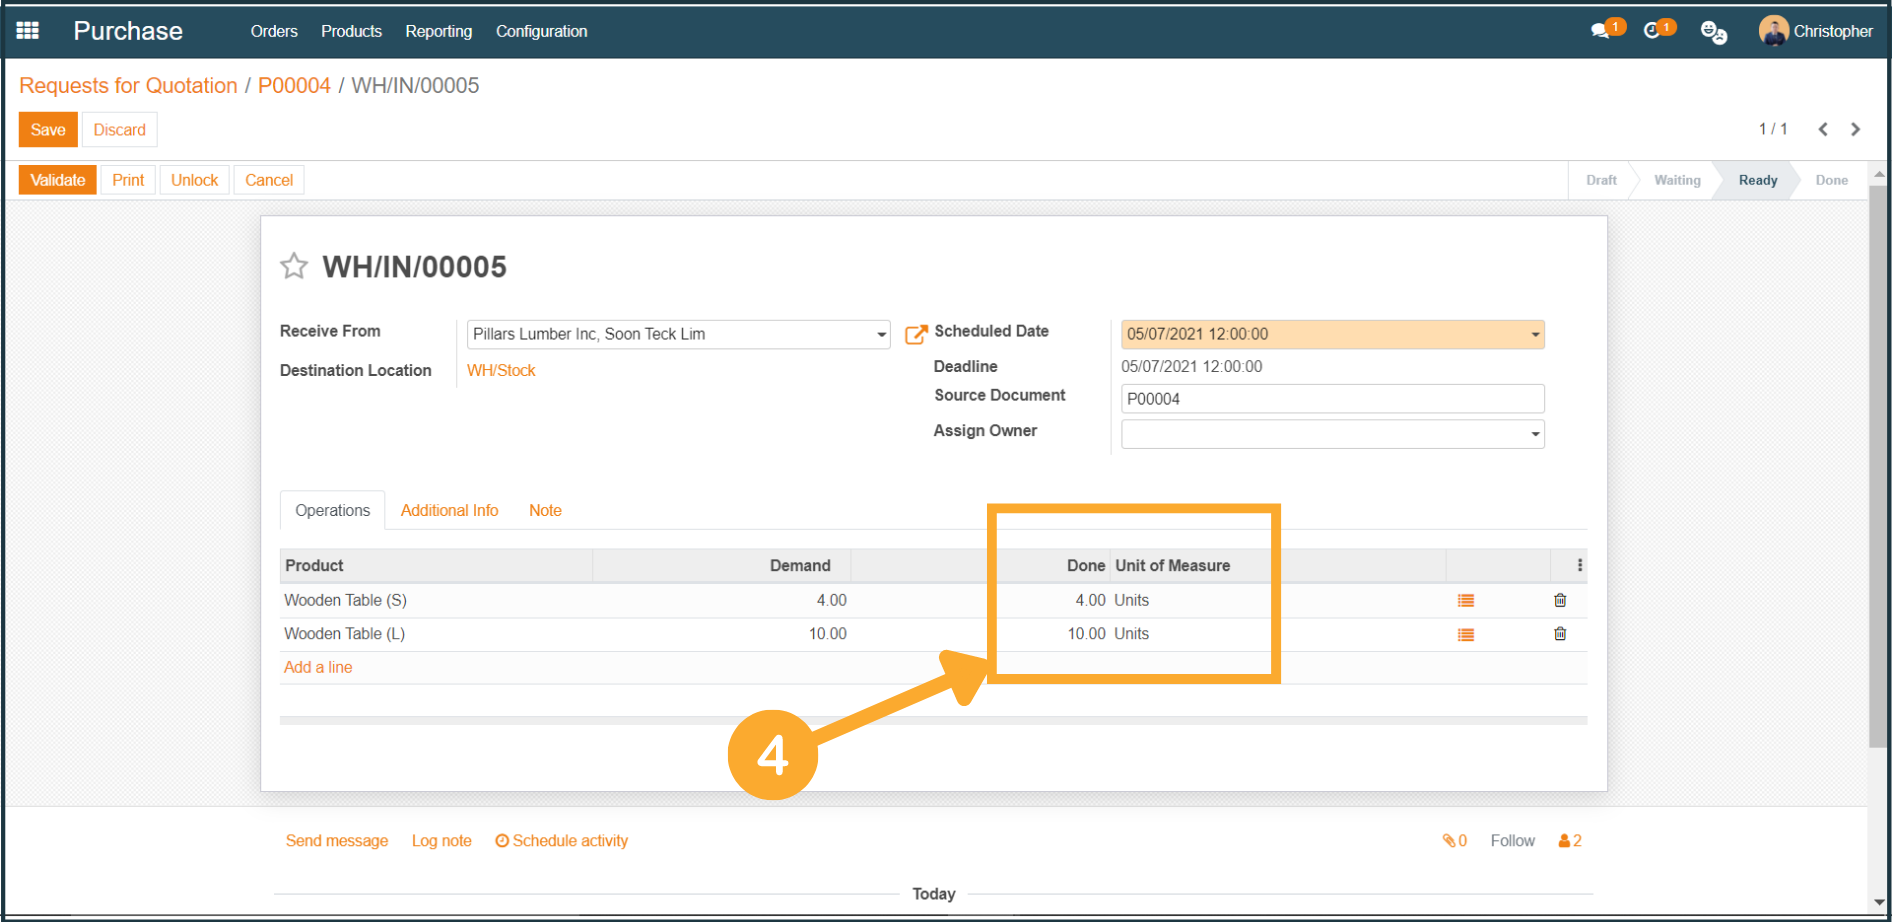
4e. By clicking “Confirm”, the “Done” amount of the product will be automatically updated.
![](/web/image/2894-b873ff12/RFQ%20%284e%29.png?access_token=d0decb8a-7f71-467d-8cba-c8e28ff9ba17)
4f. Click “Save”
![](/web/image/2895-2bb1545c/RFQ%20%284f%29.png?access_token=ce77f208-ab25-4efc-85f3-3e89cc42cdb7)
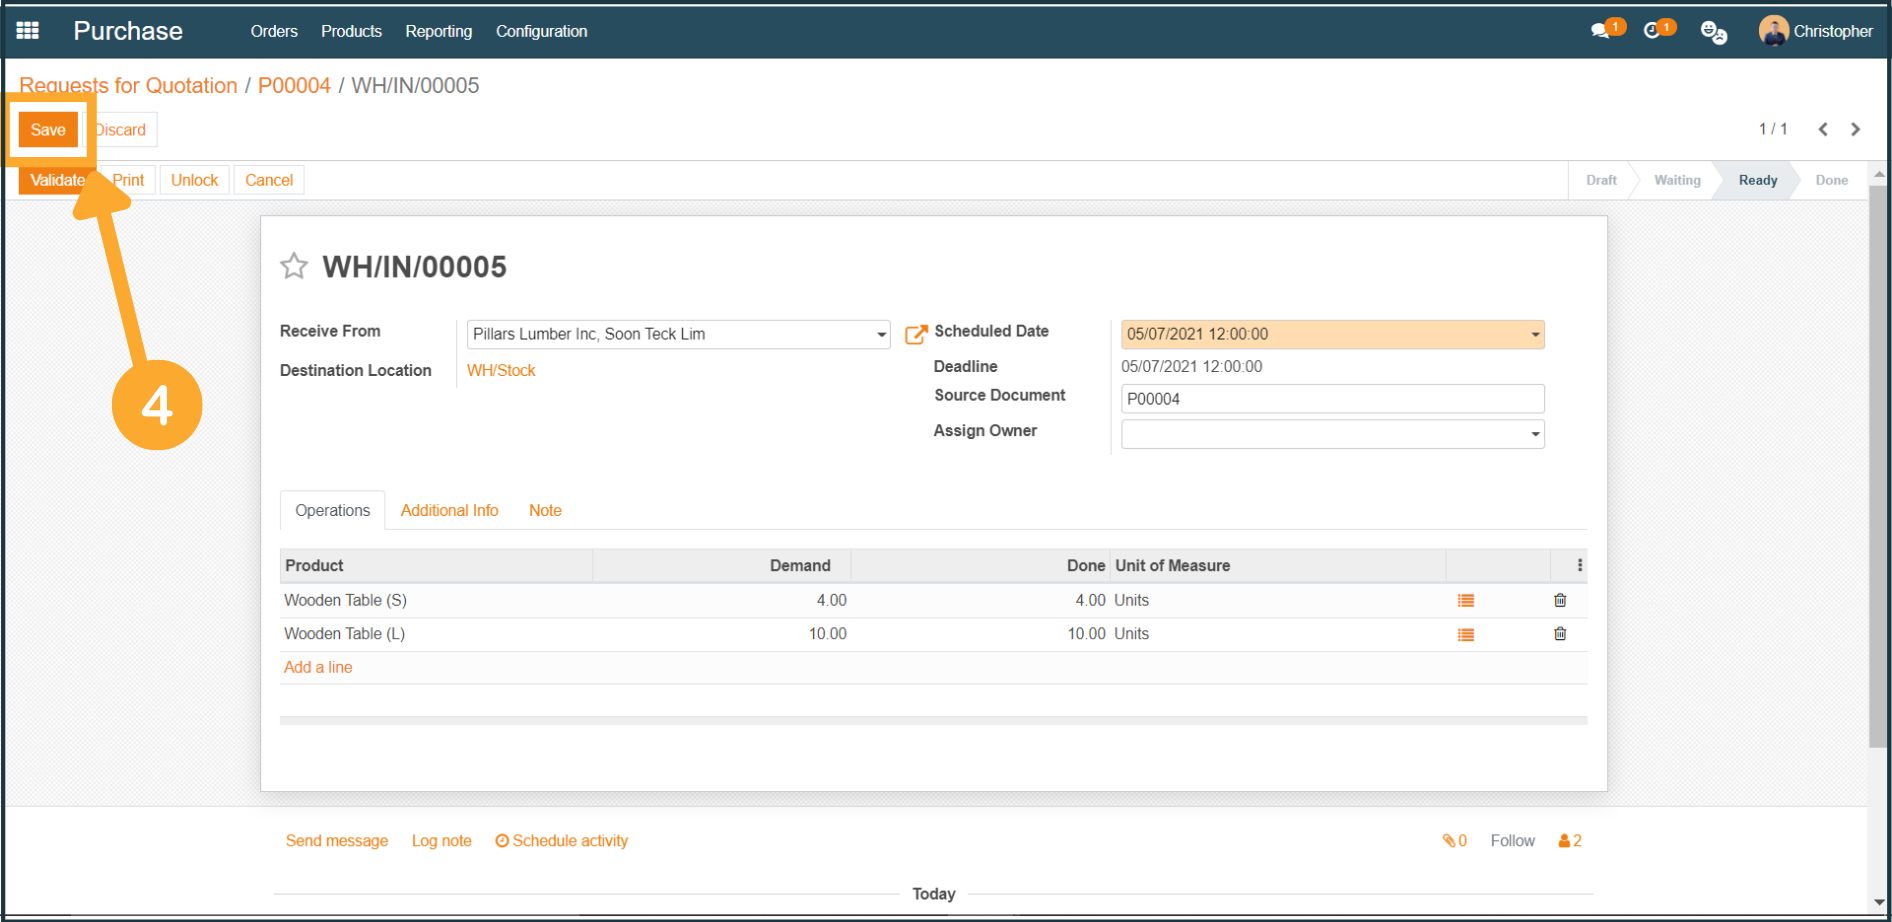
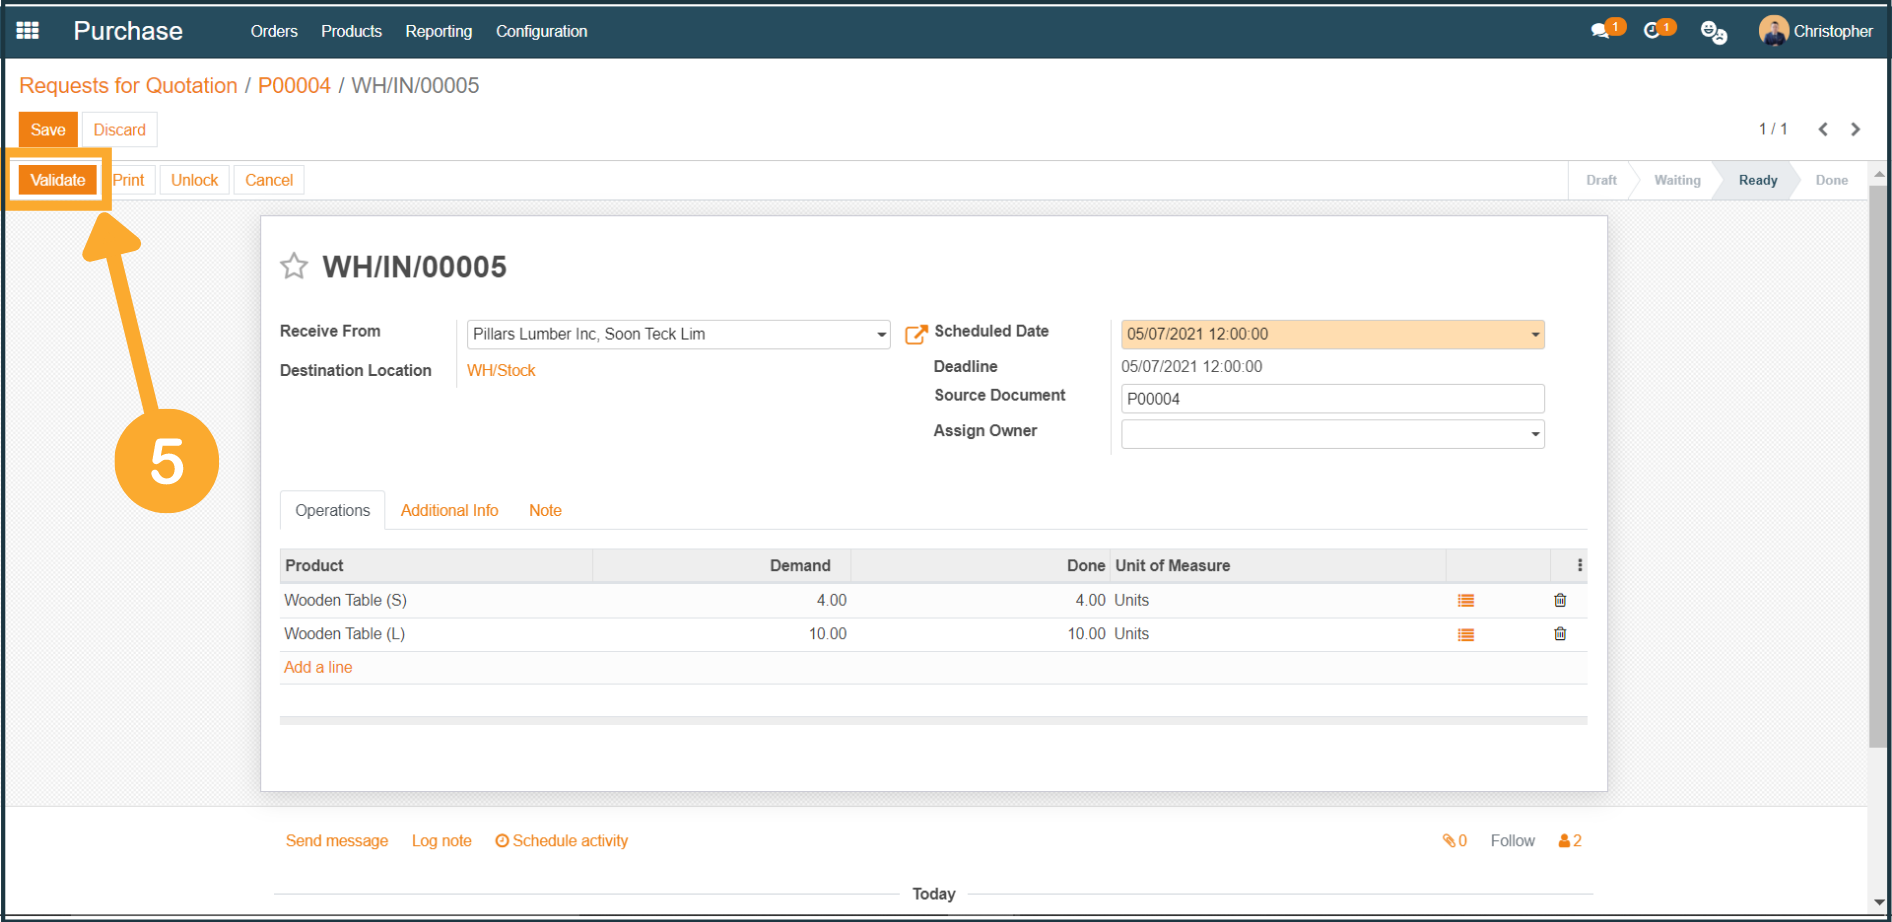
5. Double-check your Receipt Order. If everything is correct, click the "Validate" button.
![](/web/image/2896-bf289e98/RFQ%20%285%29.png?access_token=0a7dffd0-8350-4abd-b7c9-dc16a4f8f28f)
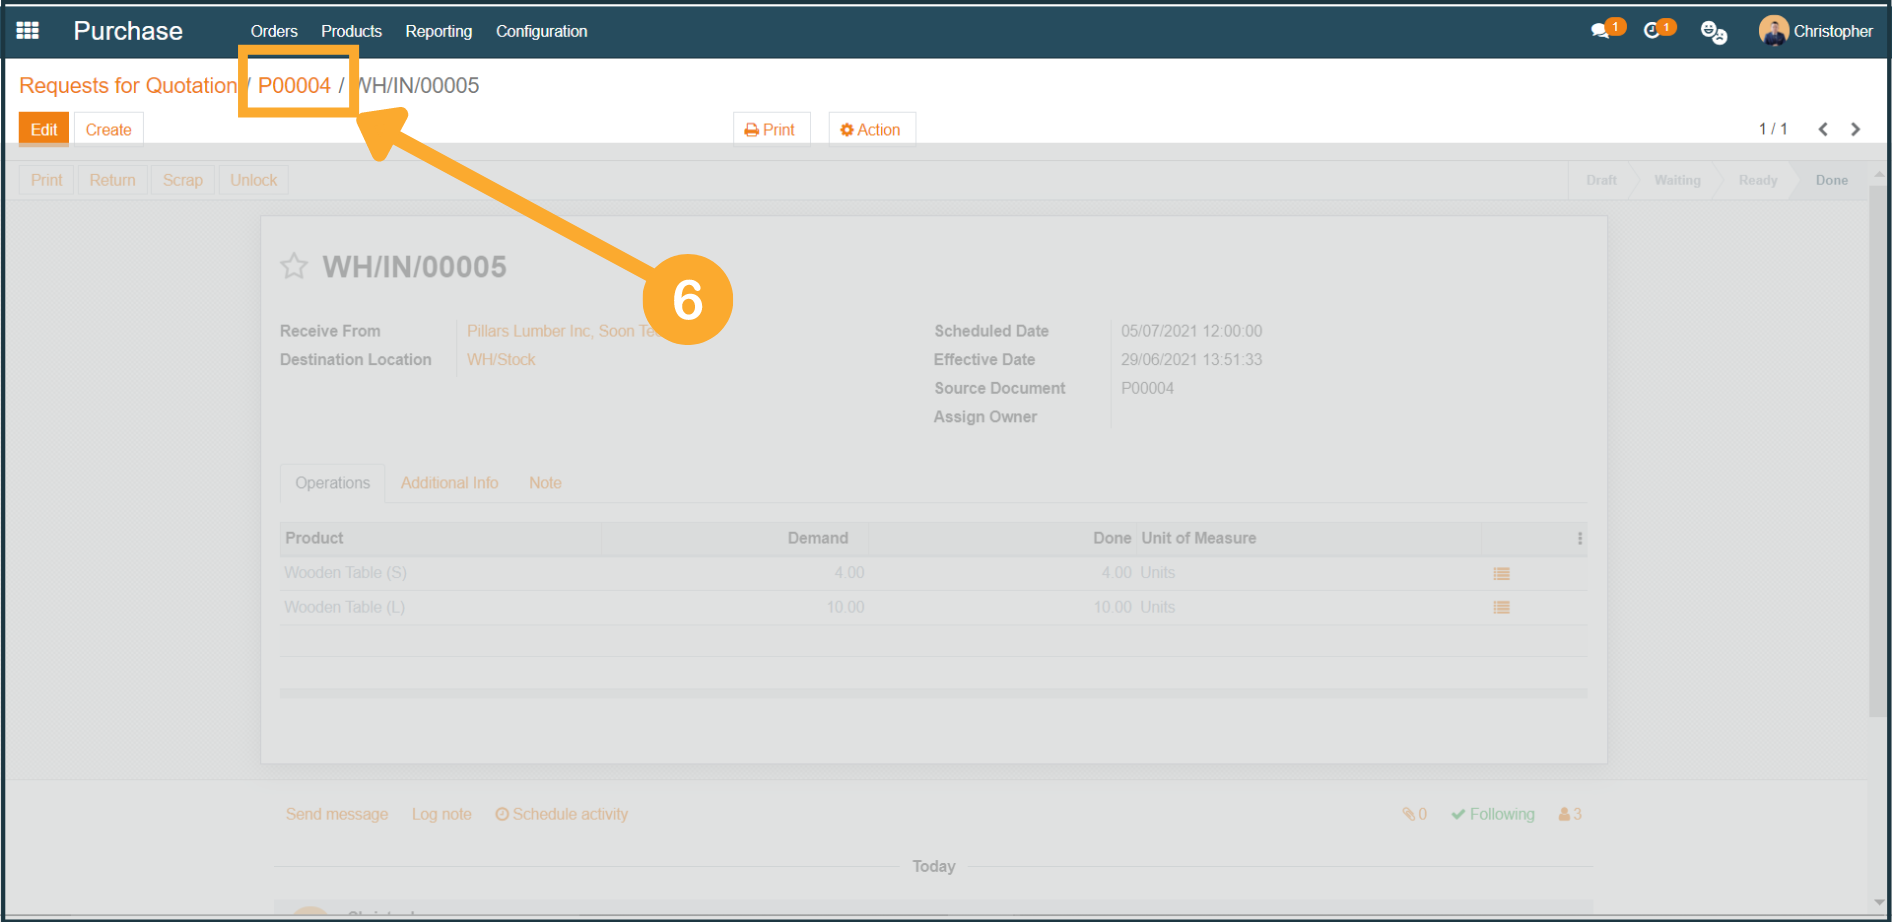
6. Navigate back to your Purchase Order in order to create a Vendor Bill.
![](/web/image/2897-8786c201/RFQ%20%286%29.png?access_token=f207cf77-36d3-4d47-b036-a27052cbab73)
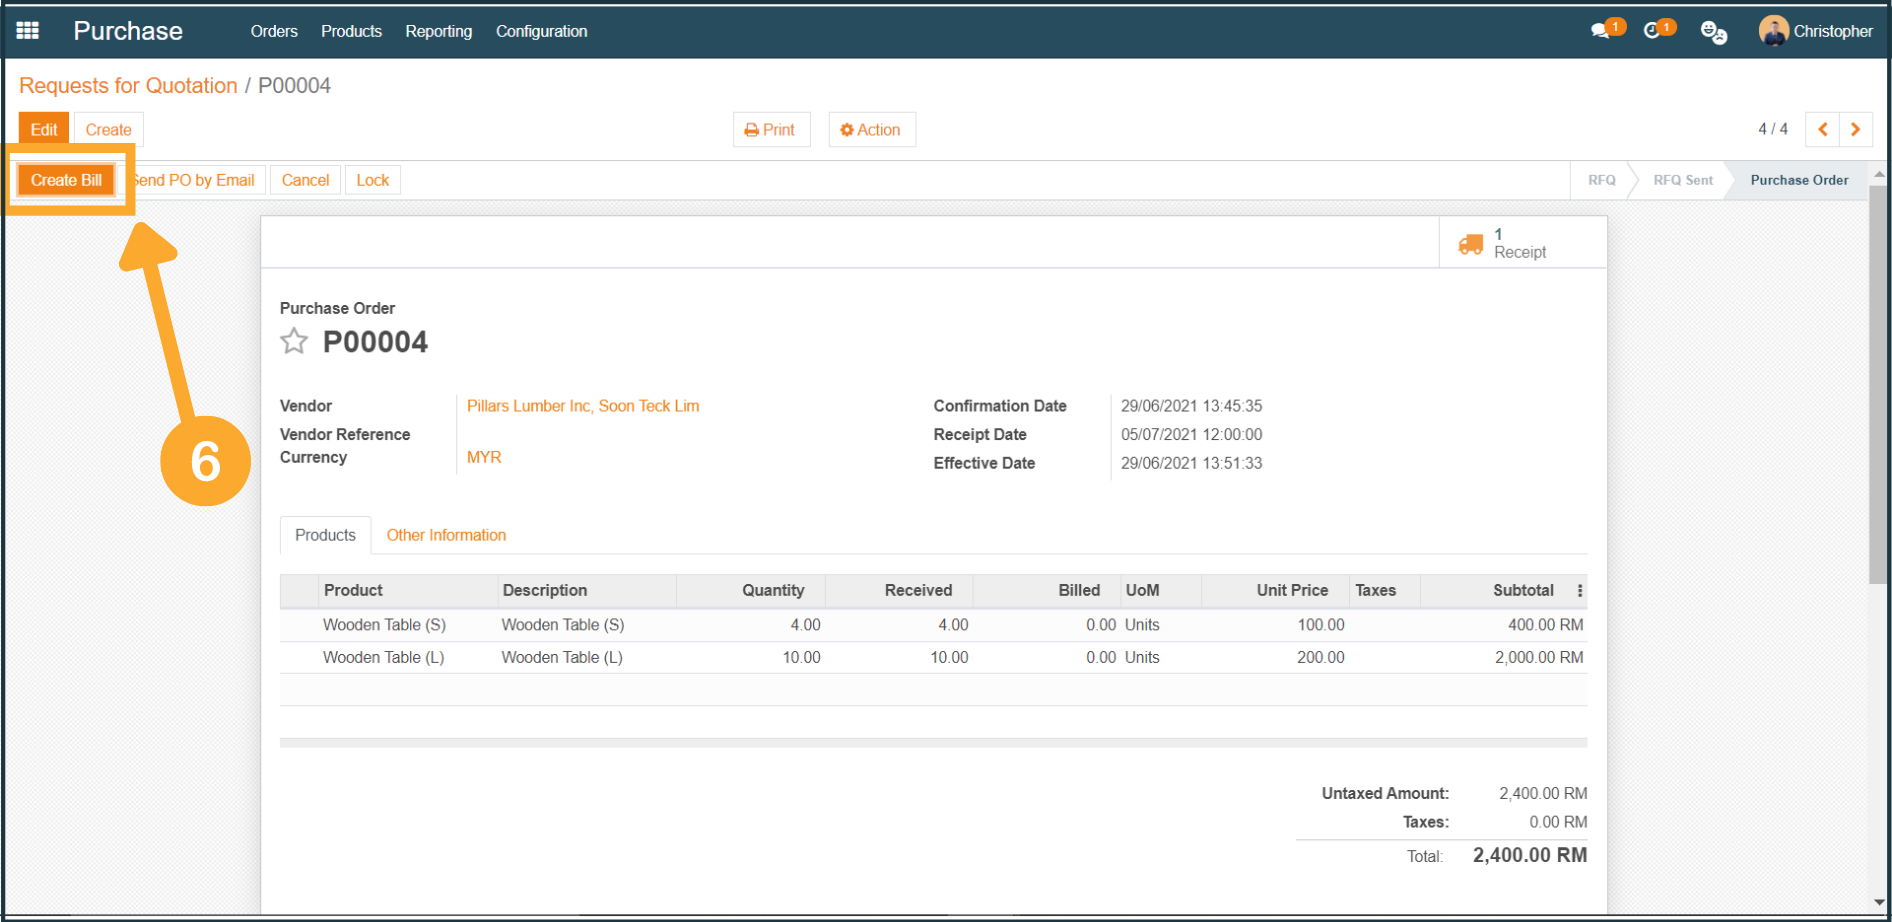
6a. To pay your vendor, at your Purchase Order, click “Create Bill”.
![](/web/image/2898-50387e0e/RFQ%20%286a%29.png?access_token=5f096a7f-ebbe-4104-b6ea-bf109118da9c)
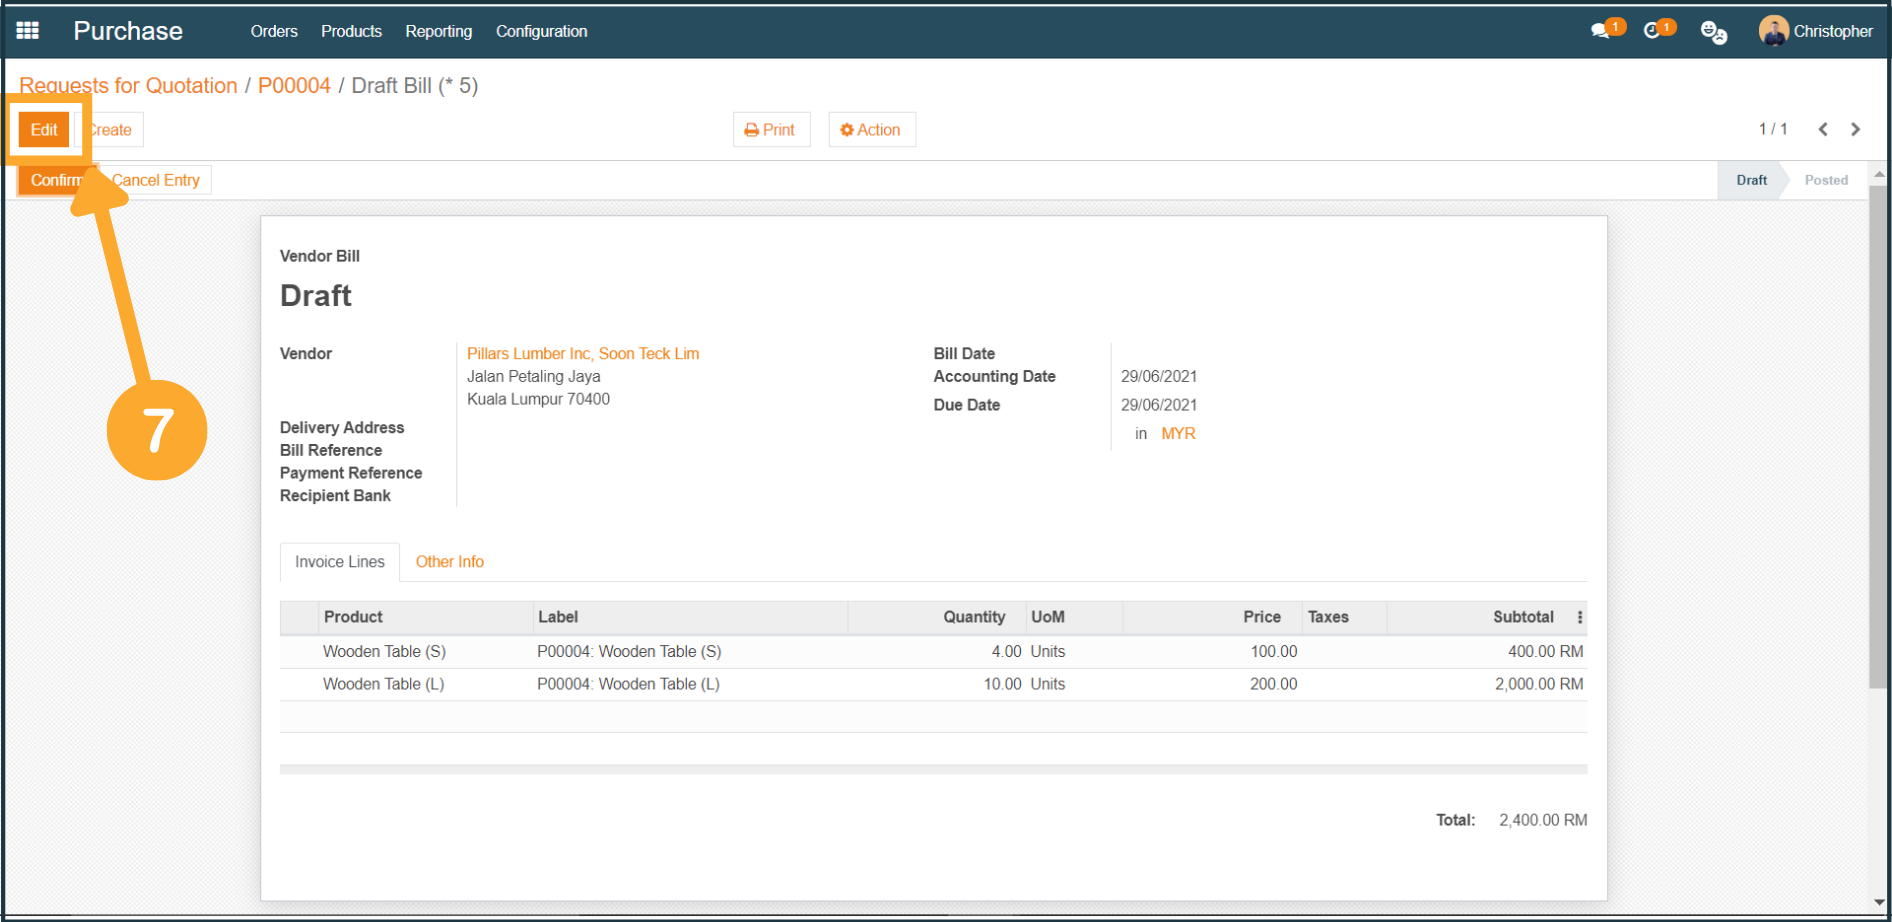
7. At the newly created Vendor Bill, click "Edit".
![](/web/image/2899-fc00f3ad/RFQ%20%287%29.png?access_token=645fa1d5-c675-4aee-832f-090c556ab3c7)
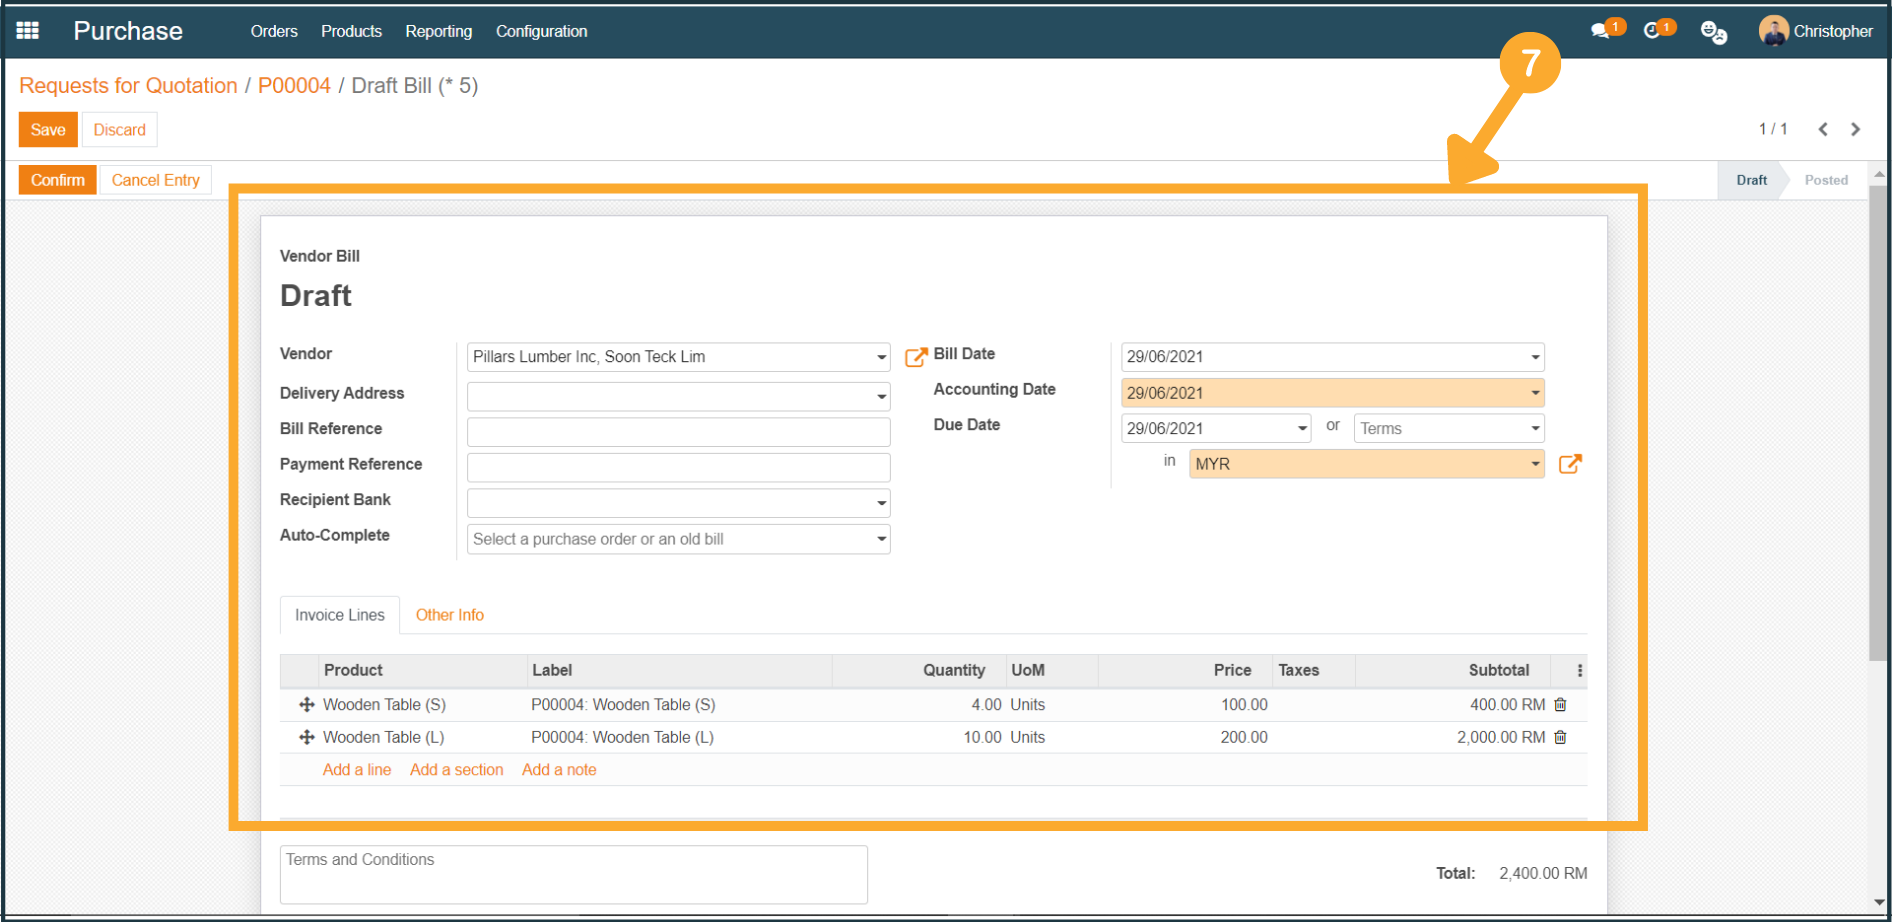
7a. Fill in the billing date and any other necessary information.
![](/web/image/2900-3d595e15/RFQ%20%287a%29.png?access_token=99c2db45-ee21-4bb2-837d-3bba86812894)
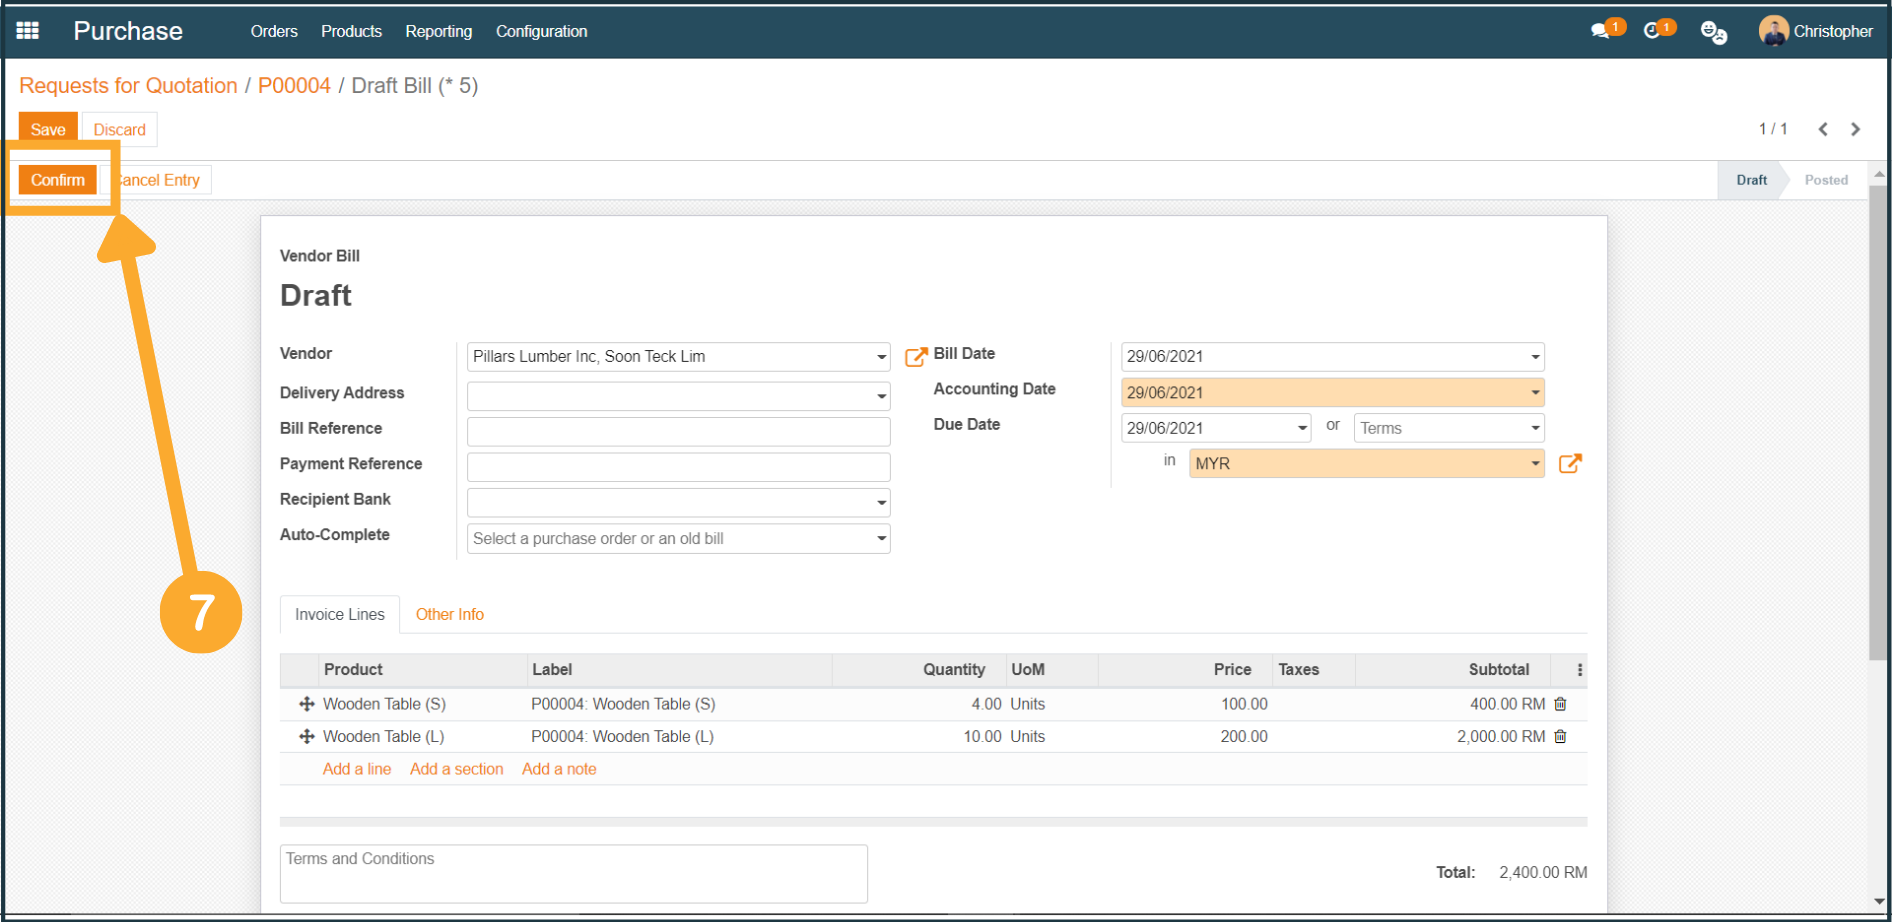
7b. Once done, click "Confirm".
![](/web/image/2901-1a9017c6/RFQ%20%287b%29.png?access_token=3df912a8-e80d-4227-92be-d0afc0b4c414)
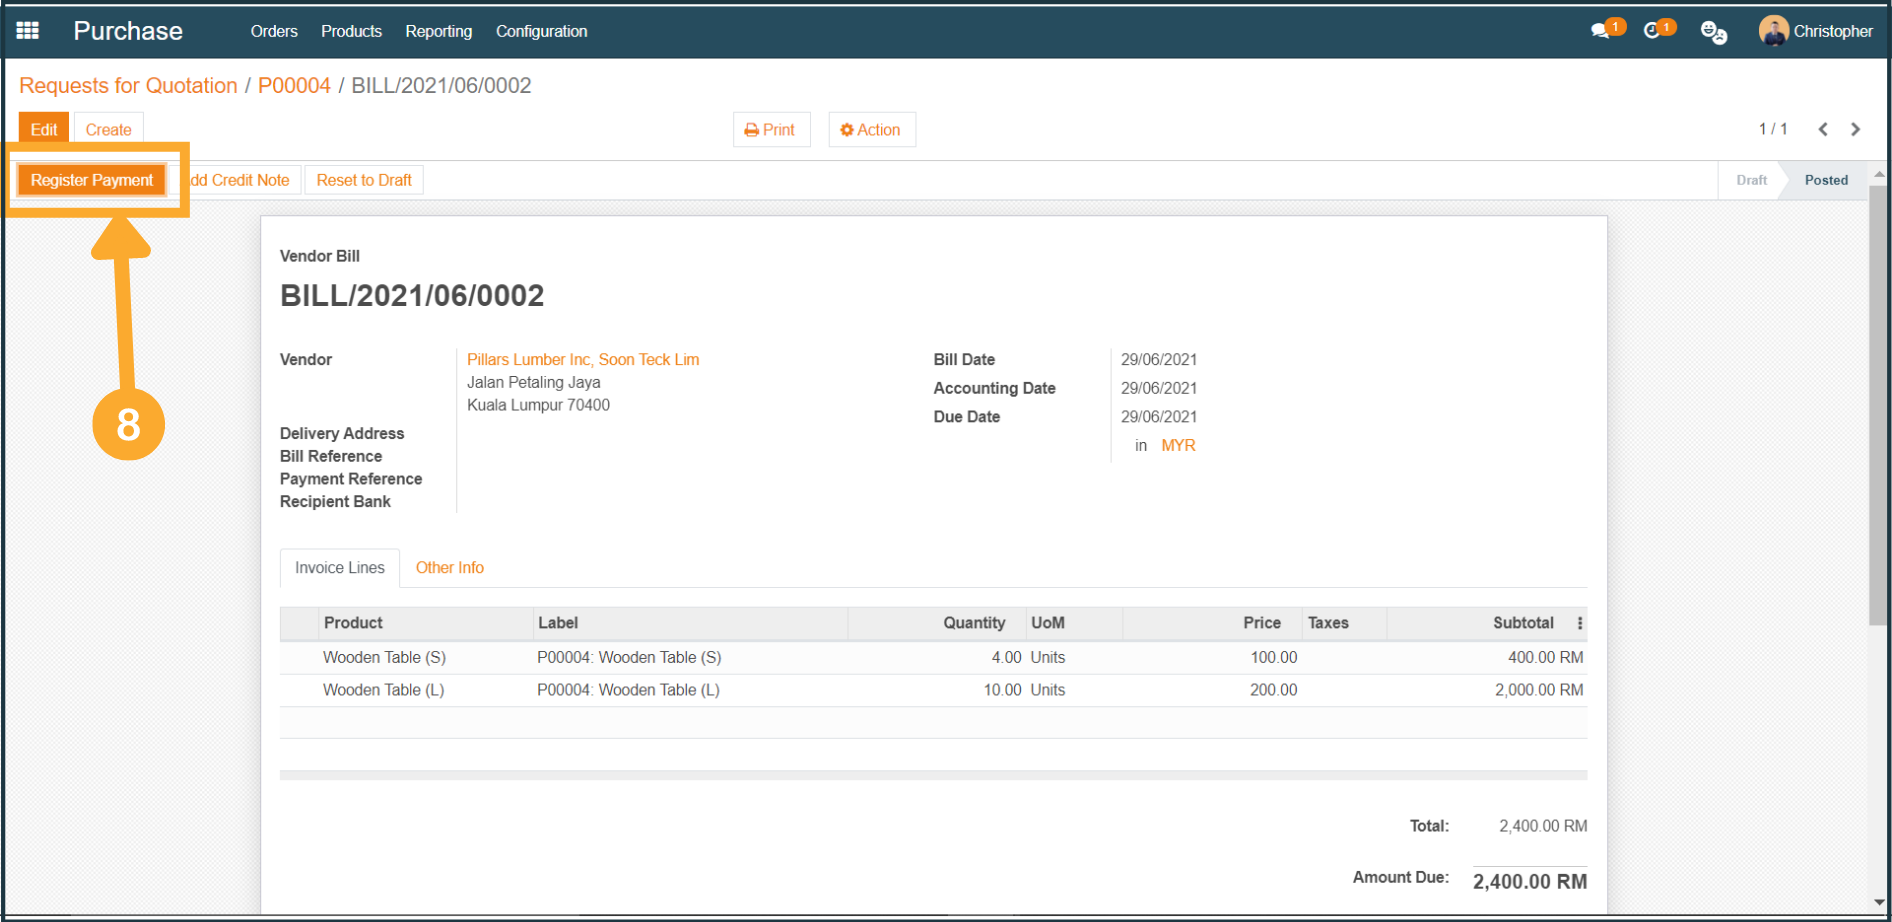
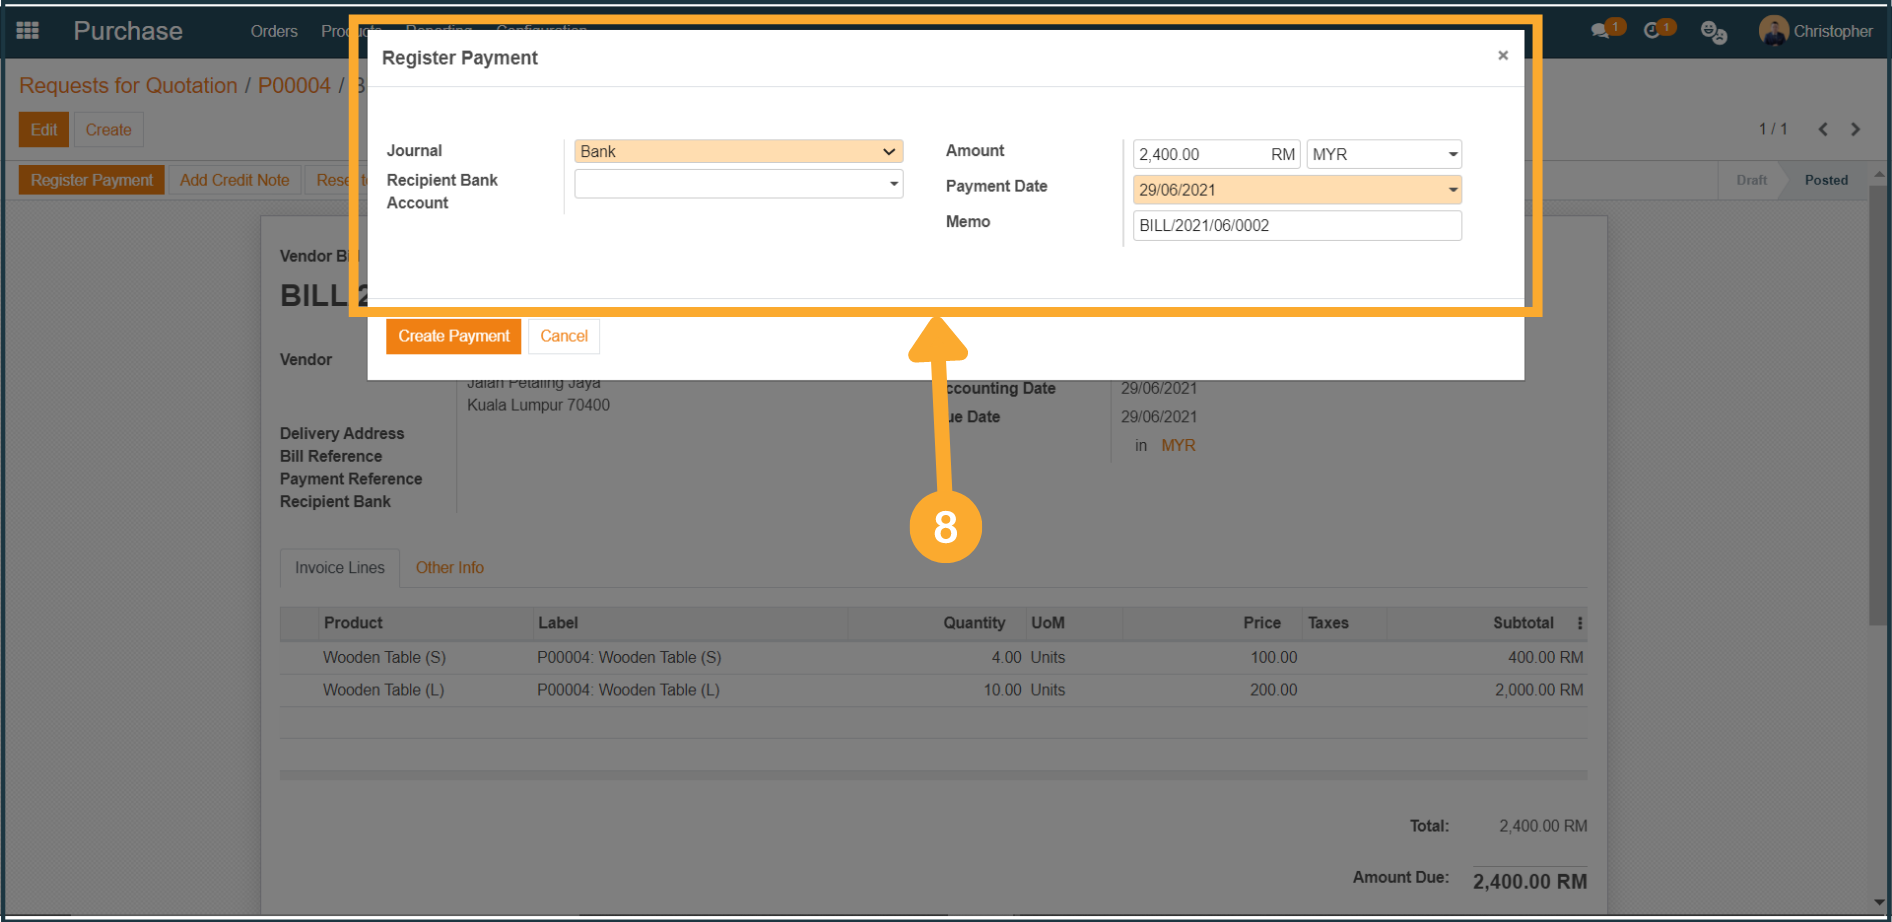
8. Once confirmed, click “Register Payment”.
![](/web/image/2902-5ef27e84/RFQ%20%288%29.png?access_token=bf86145b-716a-4870-8047-68be1c0606ea)
8a. At the Register Payment window, fill in the necessary information.
![](/web/image/2903-57c16ae4/RFQ%20%288a%29.png?access_token=517f22cc-5ea5-44a2-ba8d-04c403c5a9a0)
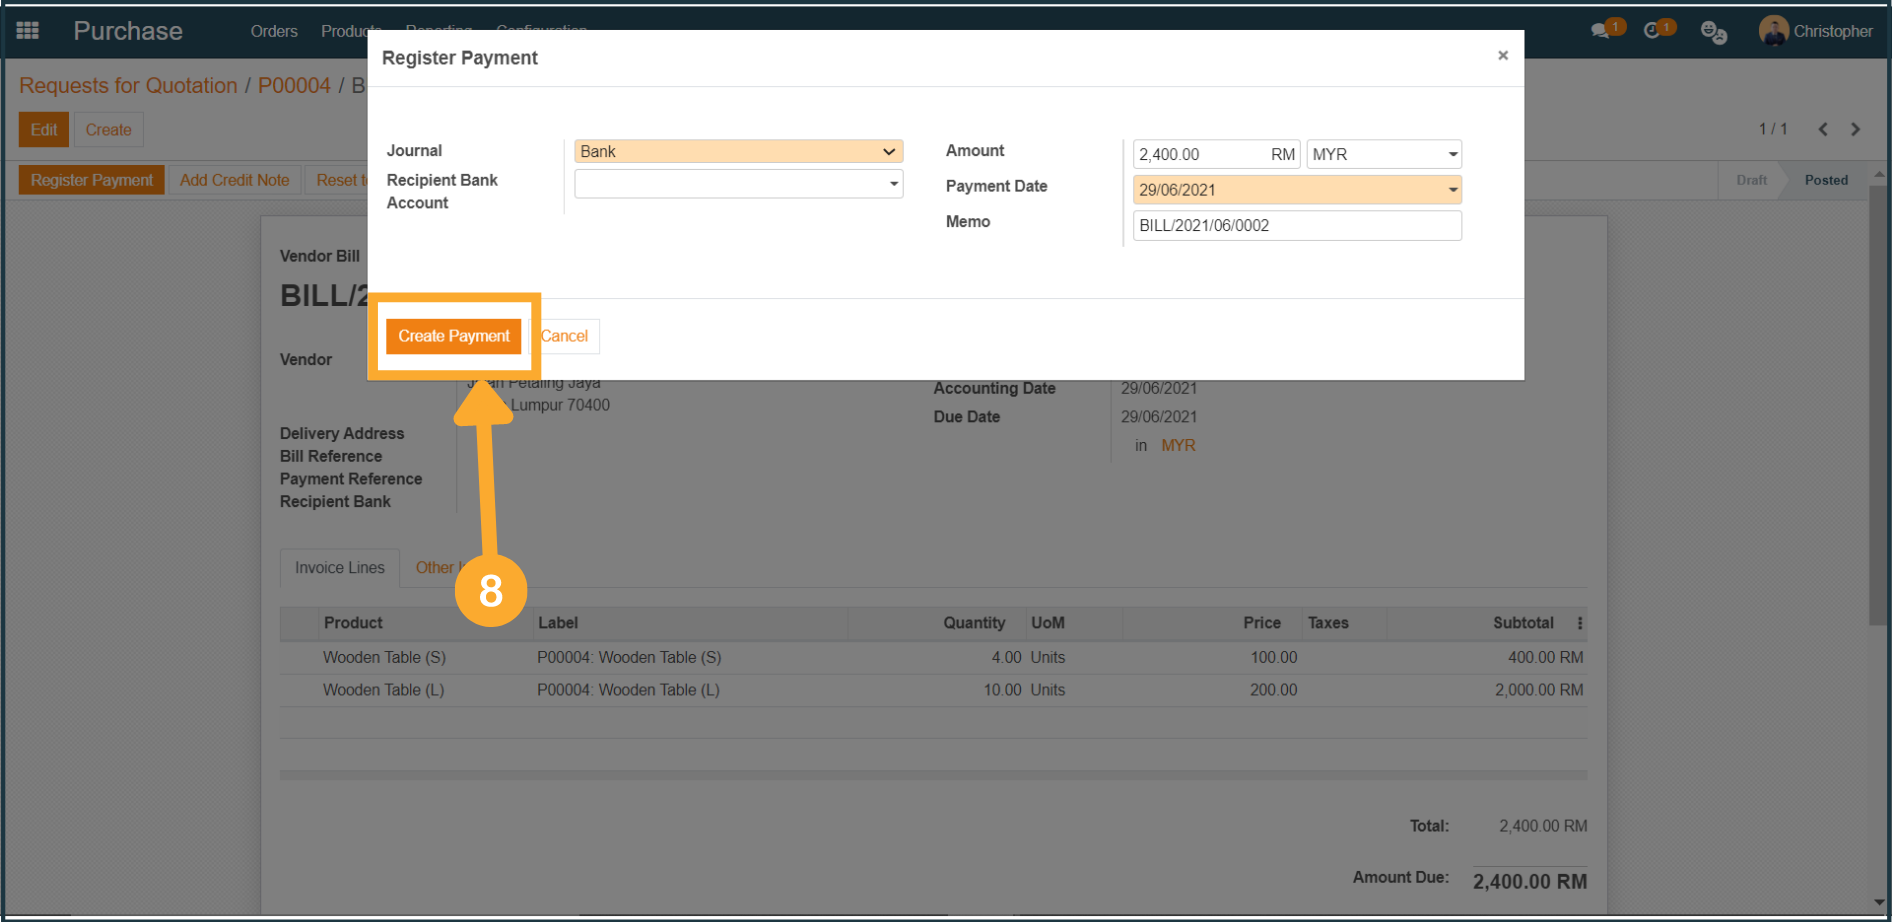
8b. After everything is done, click “Create Payment” to pay your vendor.
![](/web/image/2904-68f1fc93/RFQ%20%288b%29.png?access_token=b20f759a-b1ab-4926-abed-4877d41b9f7a)
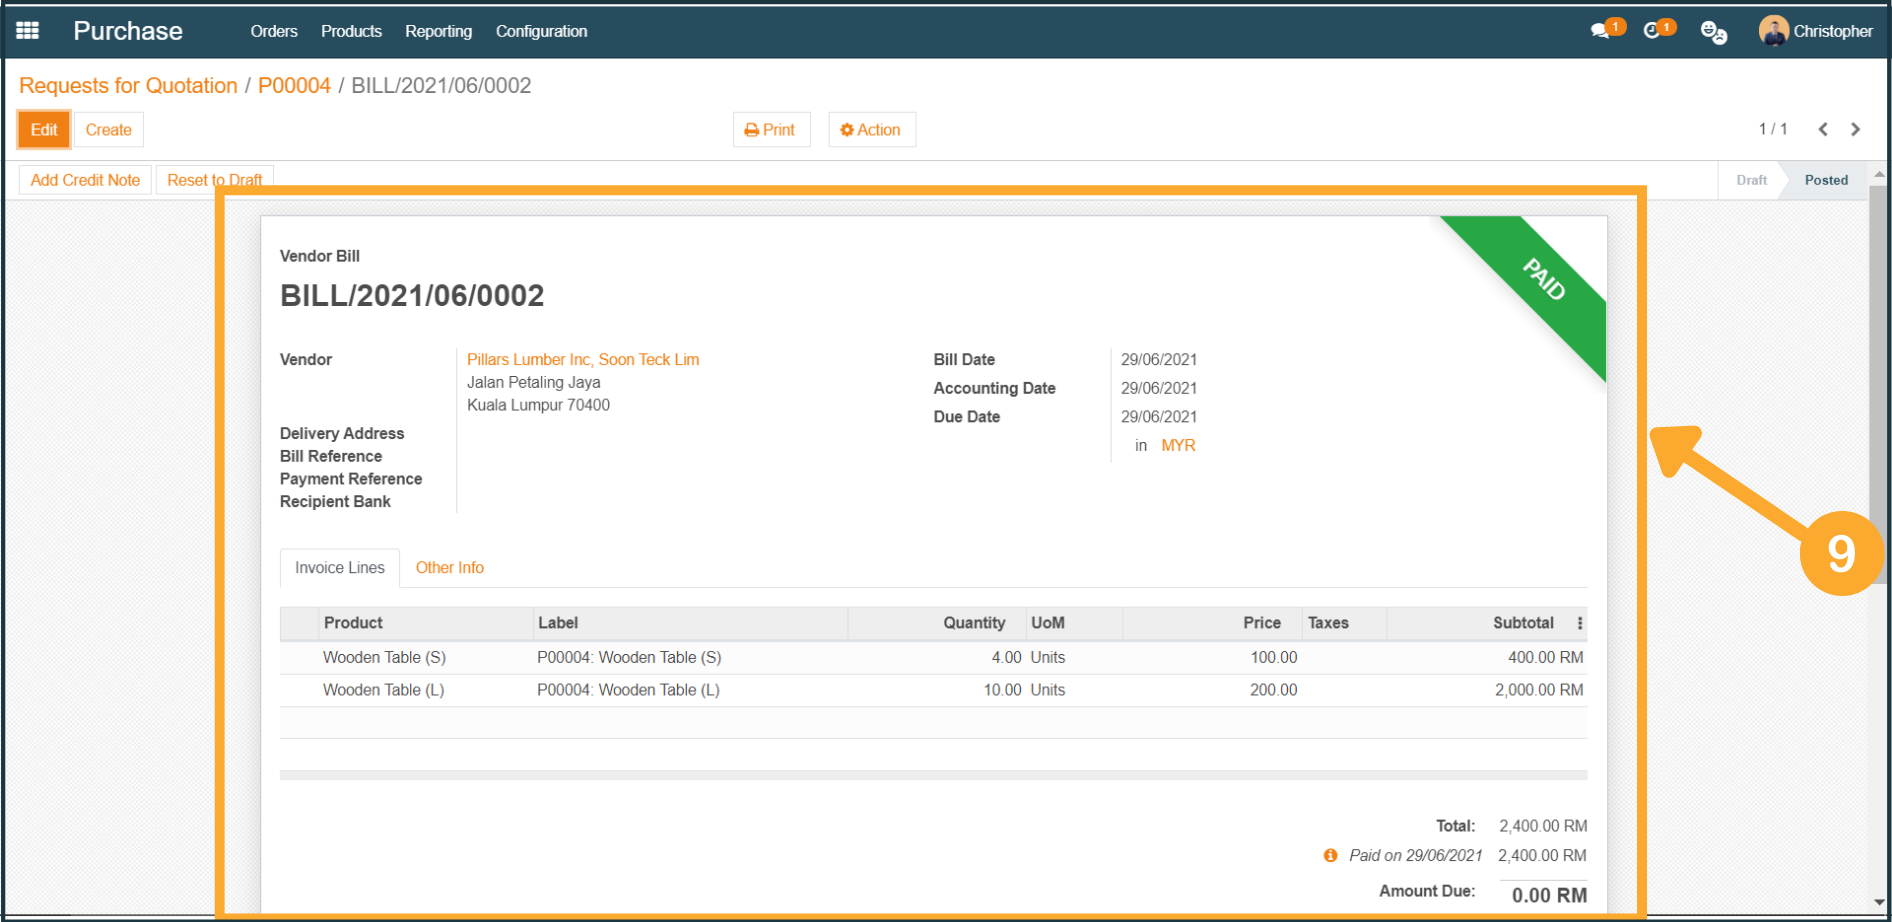
9. Your Vendor Bill is now paid.
![](/web/image/2905-82e421ba/RFQ%20%289%29.png?access_token=906ff950-02c6-4d47-9207-71721bfcb479)